源自於https://medium.com/coinmonks/arduino-to-android-real-time-communication-for-iot-with-firebase-60df579f962
Arduino to Android , Real Time Communication For IoT with Firebase
When building Internet of Things (IoT) related applications , a main problem the developer face is the communication between the micro-controller and the software application. Direct communication methods like Bluetooth/NFC can be implemented but for giving more remote access for the application we need to use internet to communicate between the two devices.
When communicating through internet , we can implement common communication methods like HTTP (Hyper Text Transfer Protocol) , MQTT(Message Queuing Telemetry Transport) to communicate between the device and the software but they are a little bit complex to implement for a simple application.
As a solution for this Google Firebase can be easily used as a intermediate communication medium for IoT devices using their powerful Real-time Database and APIs.
Here I have implemented this application using Android Studio 3.0 and as the hardware platform I have used NodeMCU 1.0 Development Board ( ESP 8266 based) which is programmed through the Arduino IDE. ( Any ESP 8266 based development board , WiFi shield + Arduino would be enough )
Making a Real-time Database
The main purpose of using a real-time database for our application is to communicate between the two applications , but how is the communication done though using a real-time database ?? Let’s See.
As soon as a field in the database is updated , the applications which are connected to the database can be notified of those changes using the APIs provided by the database. In this case if A and B are two applications which is connected to C database , if A make a change to the database , B gets notified , if B makes a change to the database A gets notified. This
So in the end what have got !? A communication medium between the two applications !
In here I have used Firebase. It is an great platform for developing mobile applications which is provided by Google.
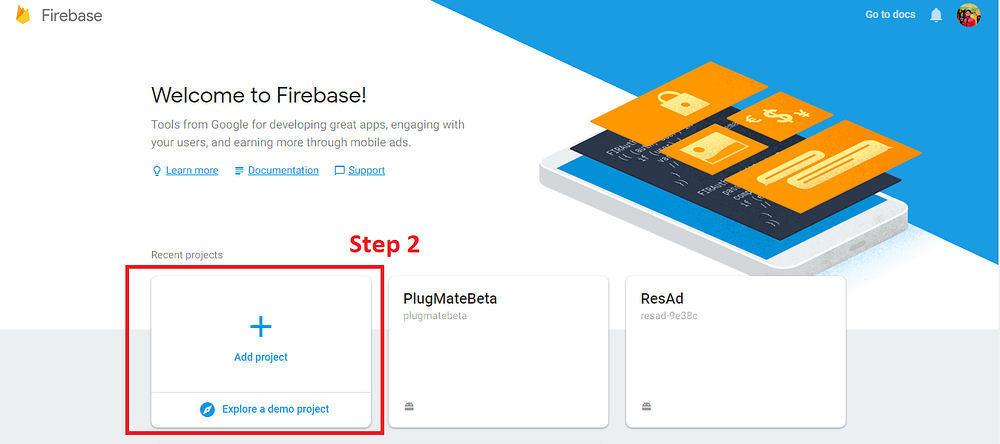
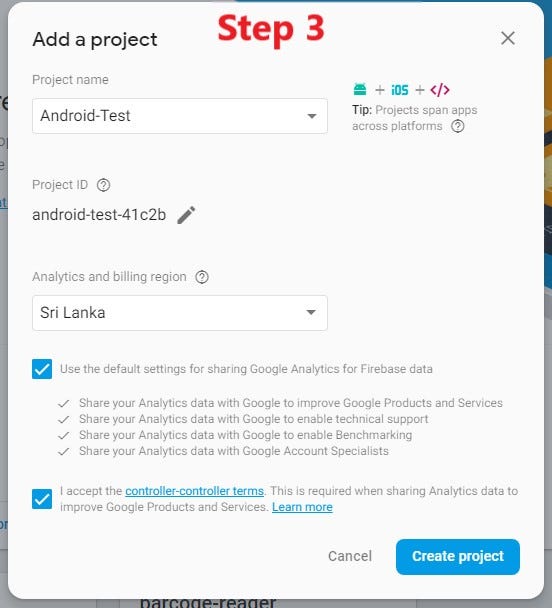
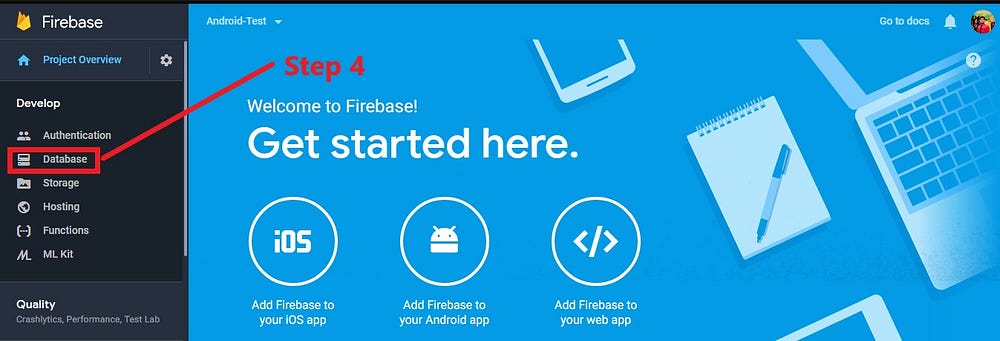
Visit this link to start using firebase. Follow the below steps to create the database.


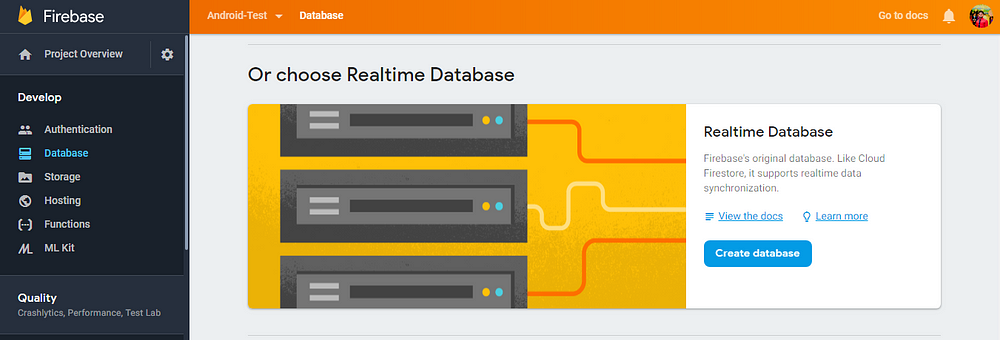
After selecting the database option ,scroll down in the next page and select create real-time database. And create it in the locked mode.
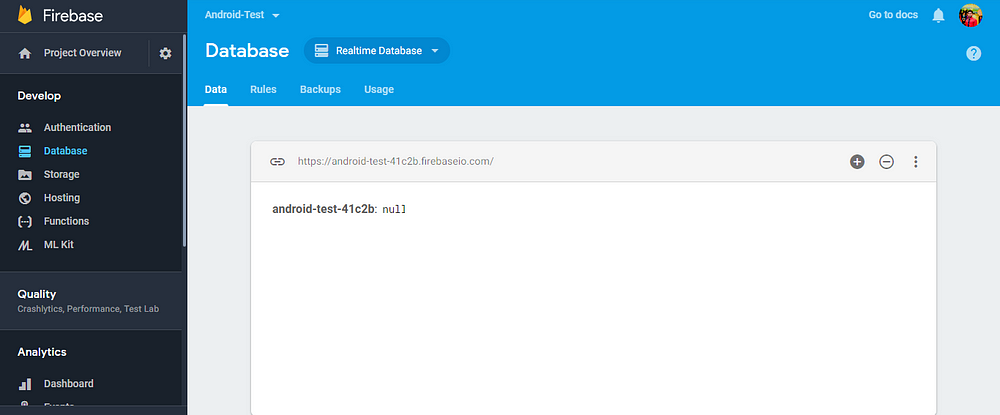
After creating the database the result would look like something like this.
Then we need to add fields to this database. Unlike normal relational databases like MySQL , Oracle , Firebase is an NoSQL database. In here data is stored in JSON format . So it is very easy for applications to access data stored in this.
If you are unfamiliar with JSON data format refer this link.
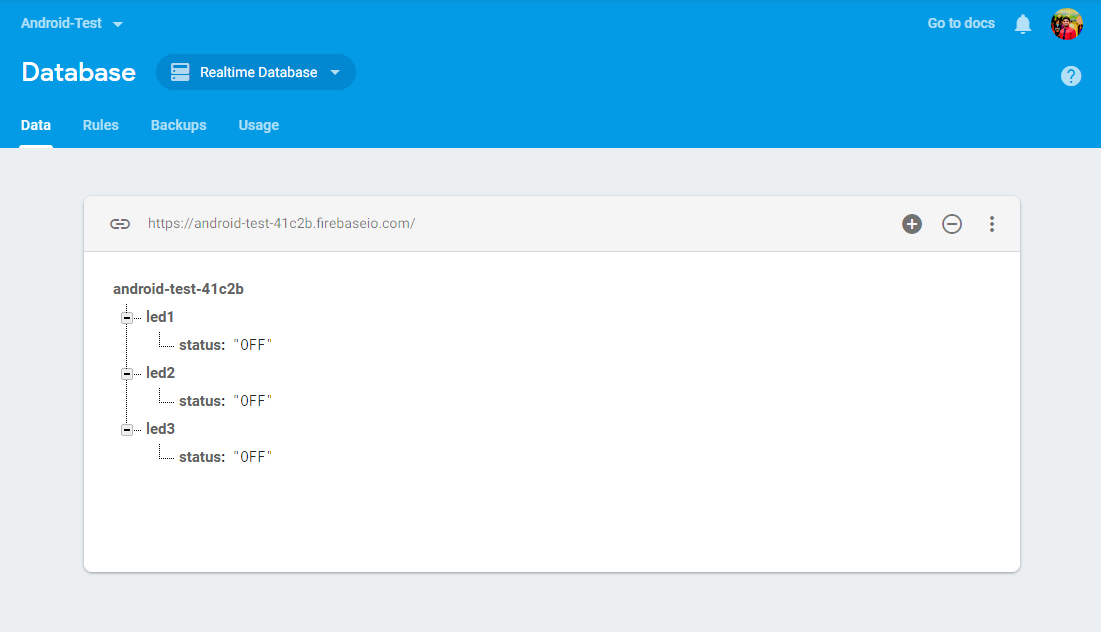
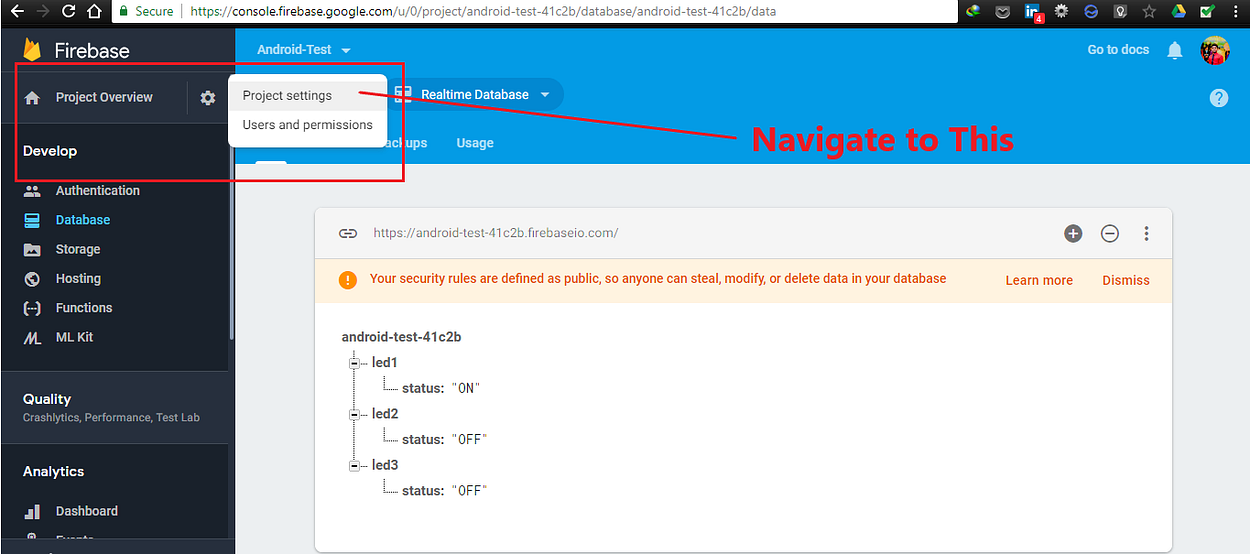
So to implement our application create a test database as below. You can add child elements to the database using the small plus (+) signs which are present in the GUI.
Then for our benefit , we need to modify the rules of the database so that any device can access our database. To do this just go to the rules tab and change the code like this.
{
  "rules": {
    ".read":true,
    ".write": true
  }
}
Now the database is all set up !
Making a sample App
To create the application which is needed to communicate with firebase I’m using Android Studio 3.0 , but this is not limited to Android. You can connect firebase to your iOS app or native web-app pretty easily.
First create a simple project in Andriod Studio. if you are unfamiliar with Android Studio watch some youtube videos and get a basic understanding. There are a LOT of resources available online.
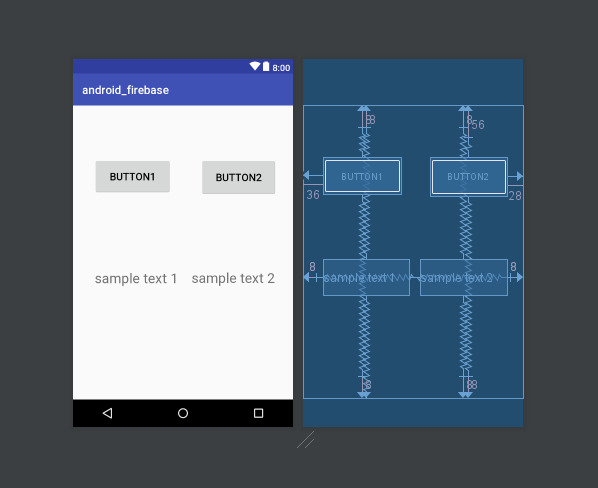
Here I have created a sample application , you can clone/download it using this link . This is a very basic design , you can enhance it to a more complex and attractive design if you are interested. :)
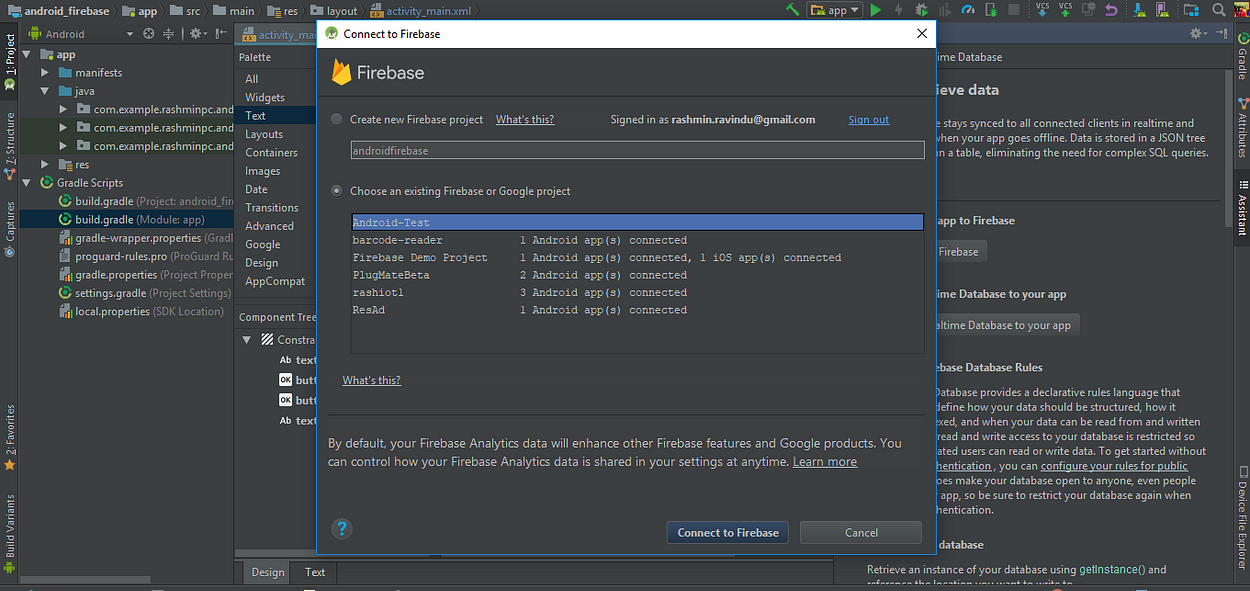
Then we need to connect android to our sample database. For this go to ,
Tools > Firebase , then from the tools pane on the right side select Real-Time Database.
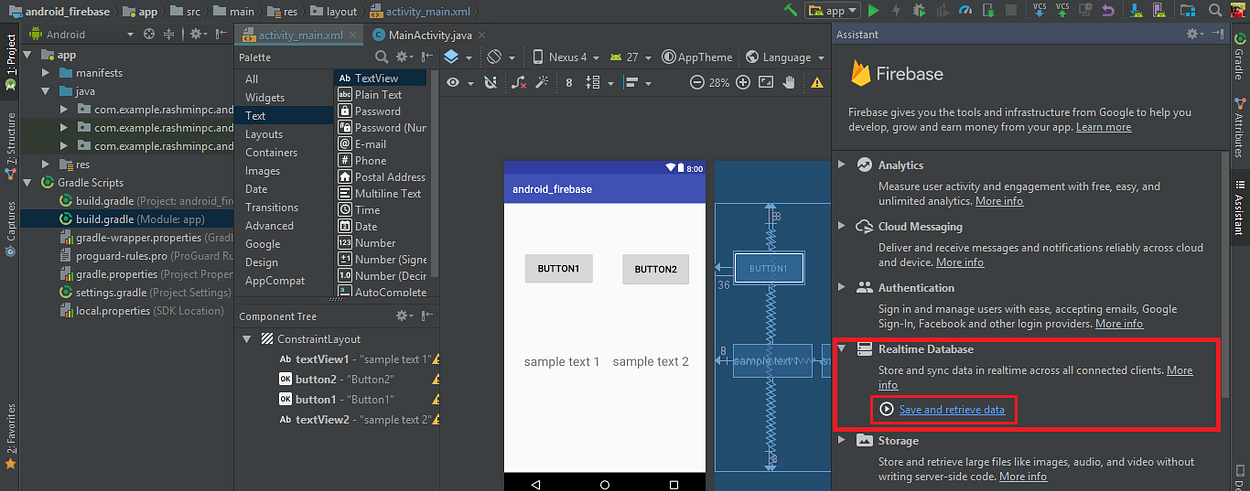
Then follow the steps 1 and 2 in the next dialog box . In the first step choose the existing database that we created.
After following step 1 and 2 it should look like this.
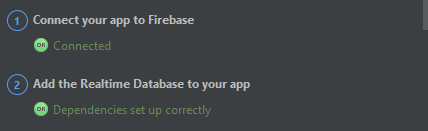
Then you are connected to the database successfully !
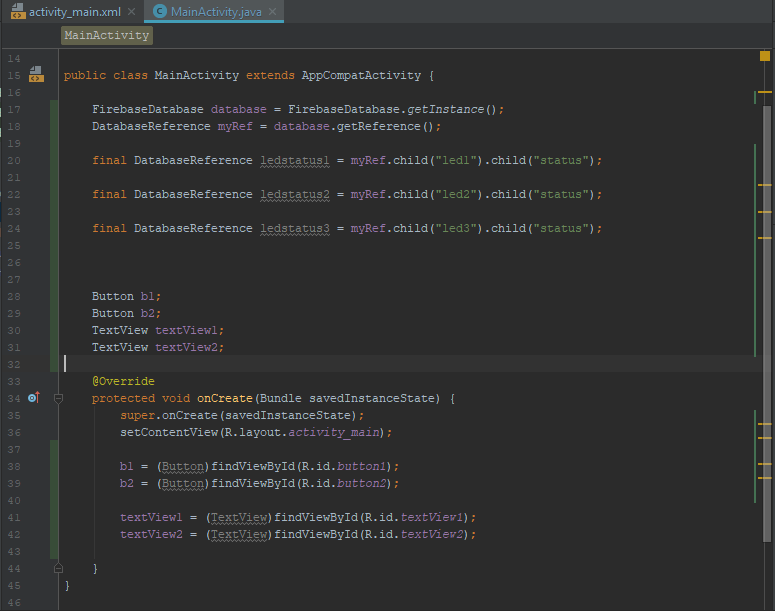
Then we will create 2 methods to grab data from the database and display it and push data to the database.
First of all , make the database connection to firebase using FirebaseDatabase Class. Apply the following code segment in your MainActivity.Java file.
FirebaseDatabase database = FirebaseDatabase.getInstance();
DatabaseReference myRef = database.getReference();
This code segment creates a connection to the root of the database. So to move further down the database tree , you can create another Database Reference like this.

Its pretty simple ! :)
Then make objects for the text and button elements. And instantiate them inside the onCreate method. The final result will look like this ,
To grab the data from Firebase I will use Firebase API’s onDataChange , onCancelled methods by calling a onValueChange listener. You can read more details on firebase docs.
Add the following code segment in your code , which adds a valueEventListner to a database reference of your choice and binds a text view to the data in that database field.

To demonstrate pushing data to the database, I will use the two buttons I have designed to change the status of the led1 field in our database. To do that I will add two onClick Listeners to the two buttons as follows.
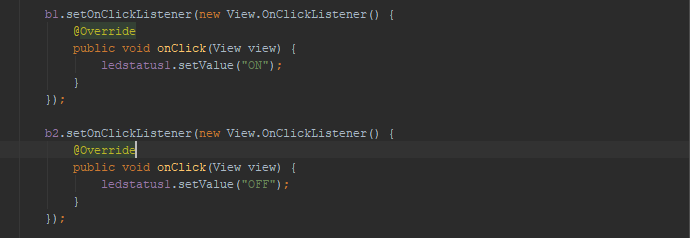
After adding the above code , you can build your project and test it by pressing the two buttons and the change in the text field ! Below is the full code segment :)
Configuring the Hardware Platform
As the hardware I have used NodeMCU . If you are new to using NodeMCU as a IoT hardware platform , this article is a good resource to begin with.
After you have set up the NodeMCU correcly. Test it by uploading a simple code to connect to your WiFi Router/ Hotspot .
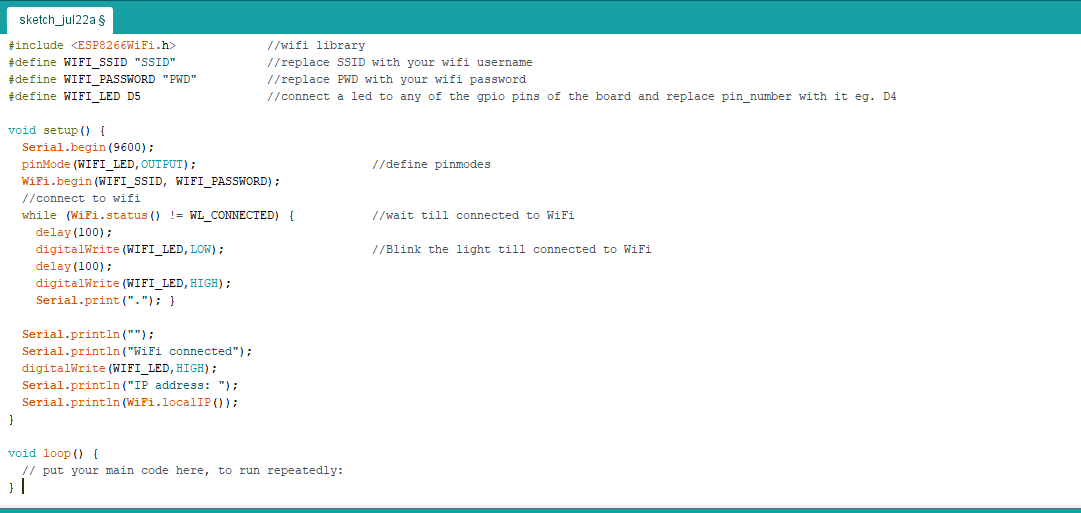
Turn on your wifi hotspot / router and upload this code to the NodeMCU , if you see the led blinking and then stop blinking and and keeps the ON state , the hardware configuration is successful !
Connect the Hardware with Database
For connecting arduino with the database , I have used the Firebase Arduino Library which is a very easy to use library with a good documentation.You can download it here.
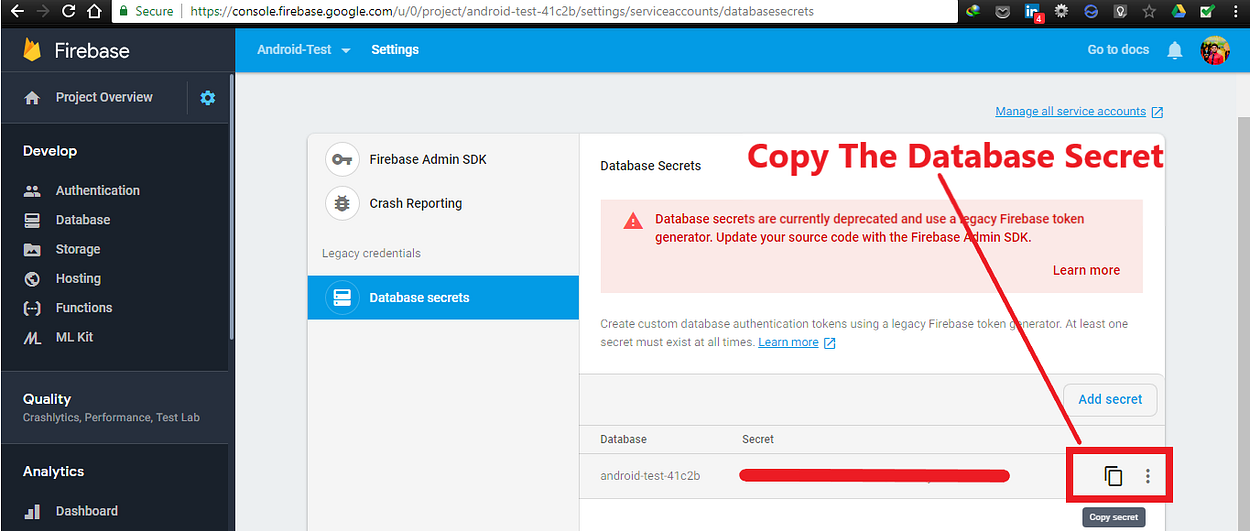
To set it up , first we need to obtain the database authentication key and the database api url.
To get the database secret , in the Firebase Database Page go to
Settings>Project Settings>Service Accounts>Database Secrets>Copy The database Secret
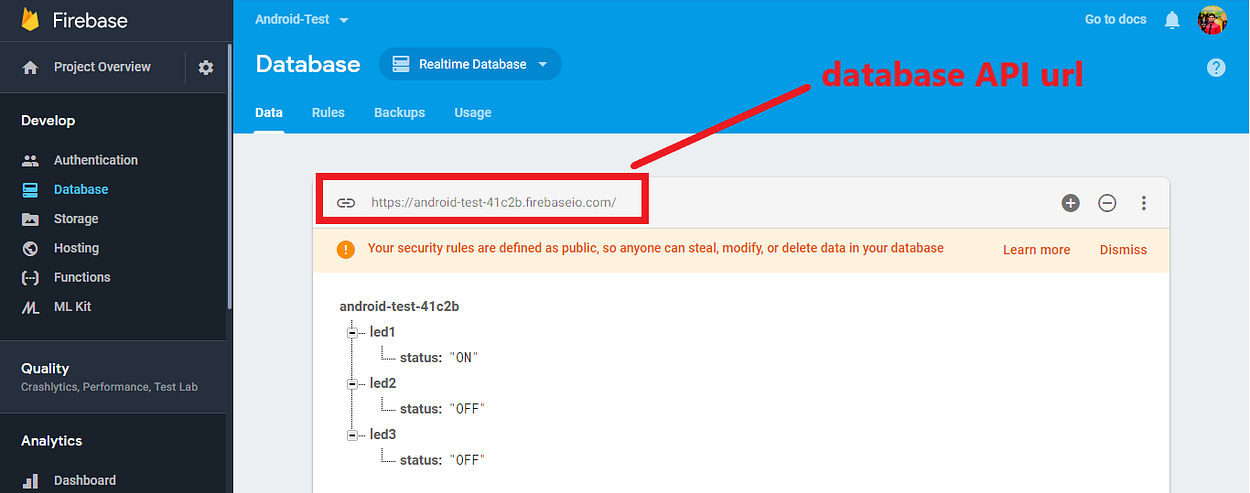
You can get the link to the database api from here ,
Then add the following lines to your arduino code to setup the firebase database.
#include <FirebaseArduino.h>
#define FIREBASE_HOST "xxxxxxxxxx.firebaseio.com" //database api url
#define FIREBASE_AUTH "xxxxxxxxxxxxxxxxxxxxxxxxxxxxxxxxxxxxx" //database secret
Following code is used to connect to the database. Put it inside the setup function.
Firebase.begin(FIREBASE_HOST, FIREBASE_AUTH);
delay(1000);
Then the hardware is successfully connected to the database. Then as an example I will implement a method to get data from the database. This will grab any data from a given database url and return the value in the database.
We can input the link to the database as “/led1/status”
String firebaseGet(String s){
    String x =Firebase.getString(s);
    yield();
    delay(100);
    return x;
    delay(100);
}
You can explore arduino firebase documentation to get to know more methods to interface with the database. You can complete your arduino code by adding a code segment to repeatedly check the value of the database.
void loop {
String firebaseResult = firebaseGet();
delay(100);
if (firebaseResult=="ON"){
    //code to happen if the status is ON
}else{
    //code to happen if the status is OFF
  }
}
That wraps up the whole application ! Now you can control anything connected to the NodeMCU/Arduino with the mobile application !!
Here is the complete arduino code.
Complete Android App Can be found here. :)
Feel free to ask questions regarding the article ! Cheers !
github — https://github.com/ravindurashmin


沒有留言:
張貼留言