- Introduction
- Preparation
- Library Installation
- MQTT Client Installation
- Upload sketch
- Configration of MQTT Client(MQTTBox)
- Program Running Result
Introduction
This lesson will show the basic MQTT protocol usage on the NodeMCU board.We use the MQTTBox as the MQTT client here, and we will use the NodeMCU to complete following operations:
- Publish "hello world" to the topic "outTopic" every two seconds.
- Subscribe to the topic "inTopic", print out any received messages.
- It assumes the received payloads are strings not binaries.
- If the subscribed message is "1", light the onboards LED.Turn off the onboard LED if the message to subscribe is "0".
It will reconnect to the server if the connection is lost using a blocking reconnect function. See the 'mqtt_reconnect_nonblocking' example for how to achieve the same result without blocking the main loop.
Preparation:
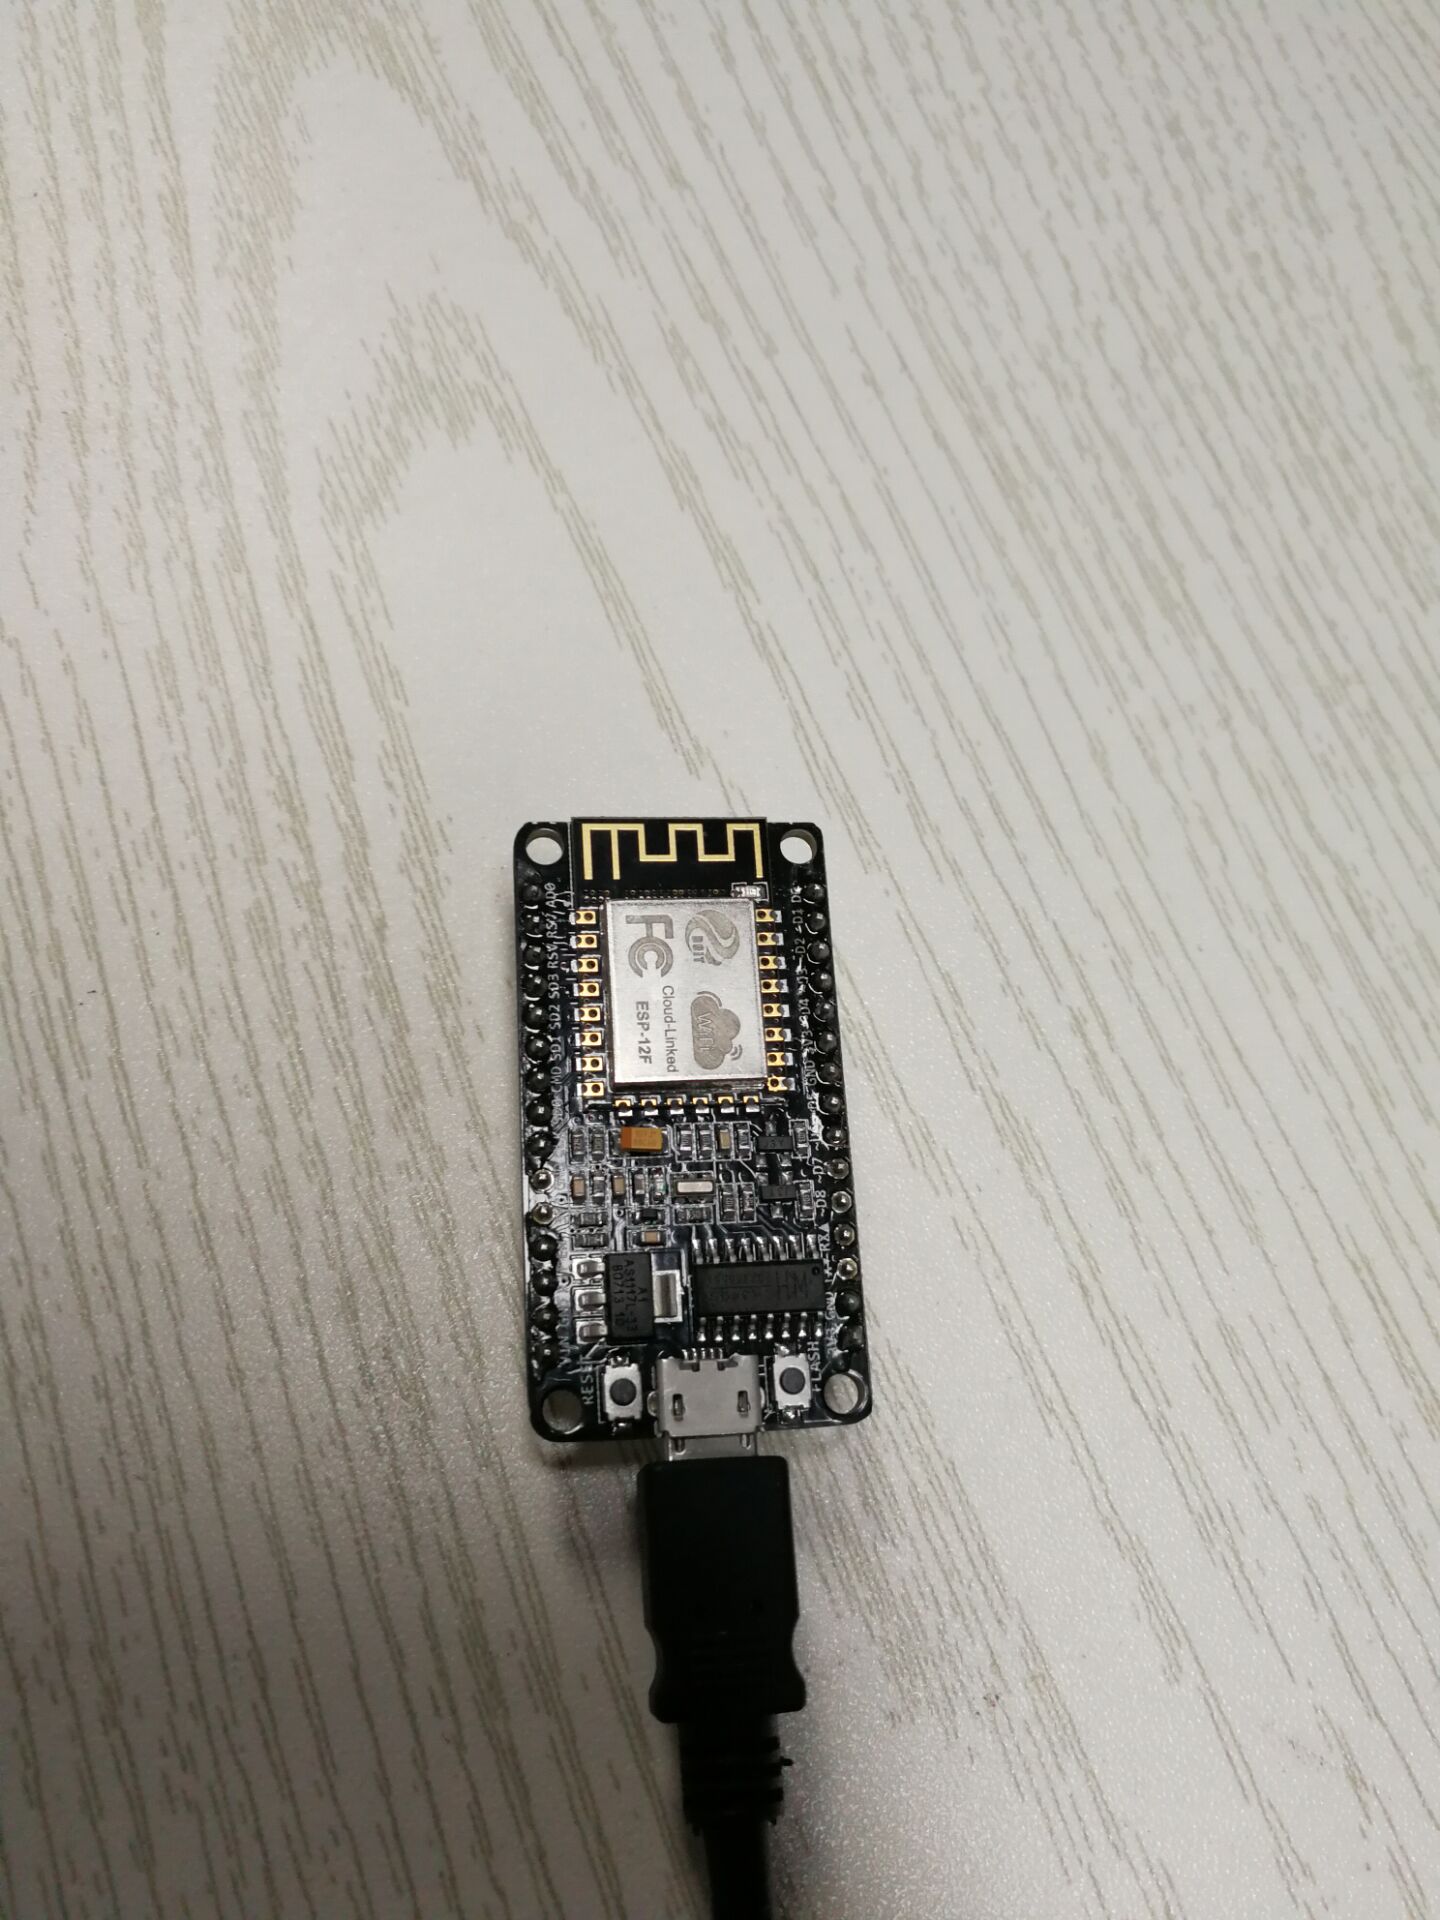
- Osoyoo NodeMCU x1
- USB Cable x1
- PC x1
- Arduino IDE(Versin 1.6.4+)
Connect the NodeMCU to PC via USB cable.
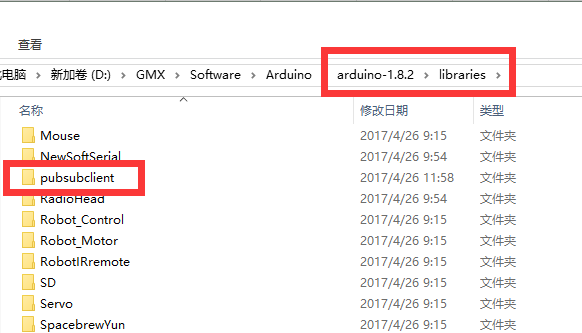
Library Installation:
We need install MQTT endpoint library(PubSubClient) to communicate with MQTT broker, please download the library from following link:
Unzip above file, move the unzipped folder to Arduino IDE library folder.
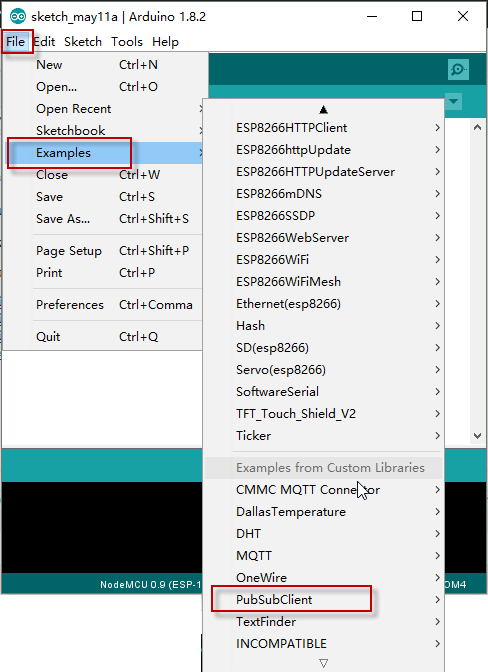
Open the Arduino IED,you can find the "pubsubclient" on the "Examples" column:
MQTT Client Installation:
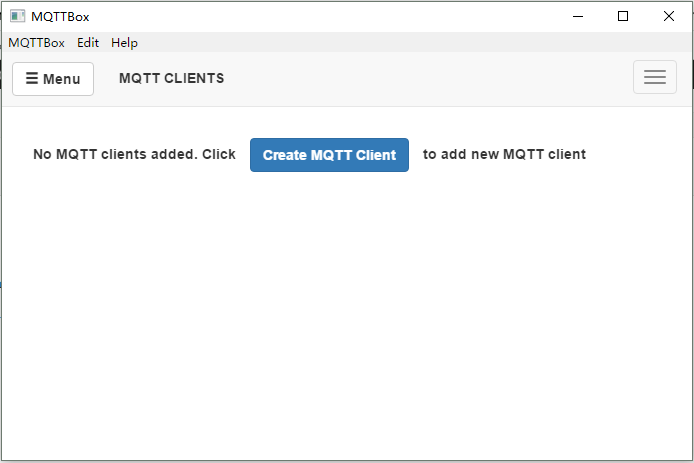
In these lessons,we will use the MQTTBox as the MQTT client.(You can also use another client )
You will see this page after installation completed:
Upload sketch
If you completed all above operations,open Arduino IDE-->File-->Example-->pubsubclient-->mqtt esp8266,you will get below code:
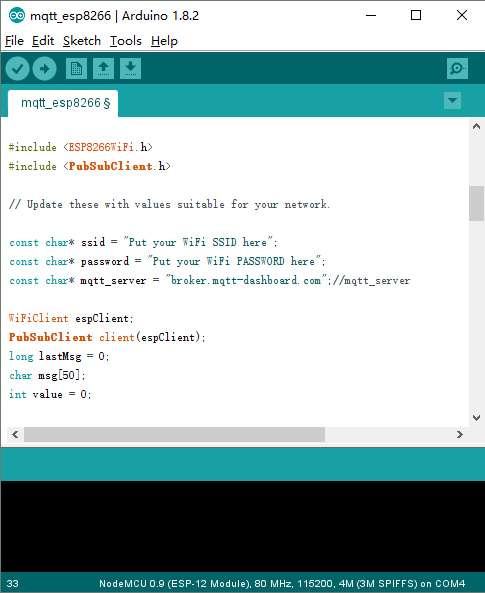
Edit the code to fit your own WiFi and MQTT settings as following operations:
1)Hotspot Configration:
const char* ssid = "your_hotspot_ssid";const char* password = "your_hotspot_password";
Find above code line,put your own ssid and password on there.
2)MQTT Server Address Setting
const char* mqtt_server = "broker.mqtt-dashboard.com";
You can use your own MQTT broker URL or IP address to set above mqtt_server value. You can also use some famous free MQTT server to test the project such as "broker.mqtt-dashboard.com", "iot.eclipse.org" etc.
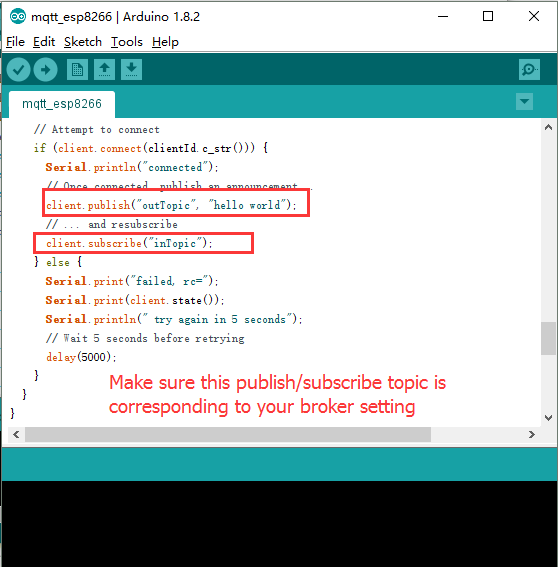
3)MQTT Client Settings
If your MQTT broker require clientID,username and password authentication,you need to change
if (client.connect(clientId.c_str()))
to
if (client.connect(clientId,userName,passWord)) //put your clientId/userName/passWord here
If not,just keep them as default.
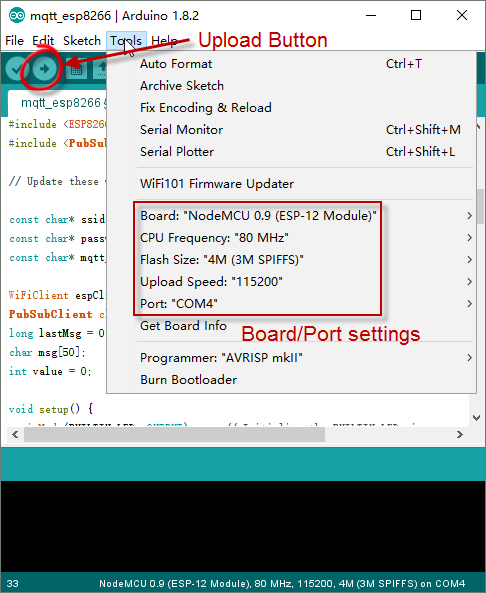
After do that,choose the coresponding board type and port type as below,then upload the sketch to the NodeMCU.
- Board:"NodeMCU 0.9(ESP-12 Module)"
- CPU Frequency:"80MHz"
- Flash Size:"4M (3M SPIFFS)"
- Upload Speed:"115200"
- Port: Choose your own Serial Port for your NodeMCU
Configration of MQTT Client (MQTTBOX)
In this step,we will show how to create an MQTT client on the MQTTBox.
Open your MQTTBox and click the blue button to add a new MQTT client.
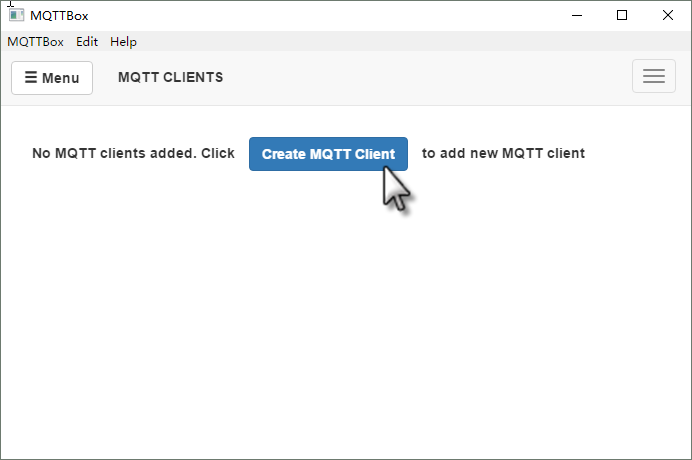
Then you will see:
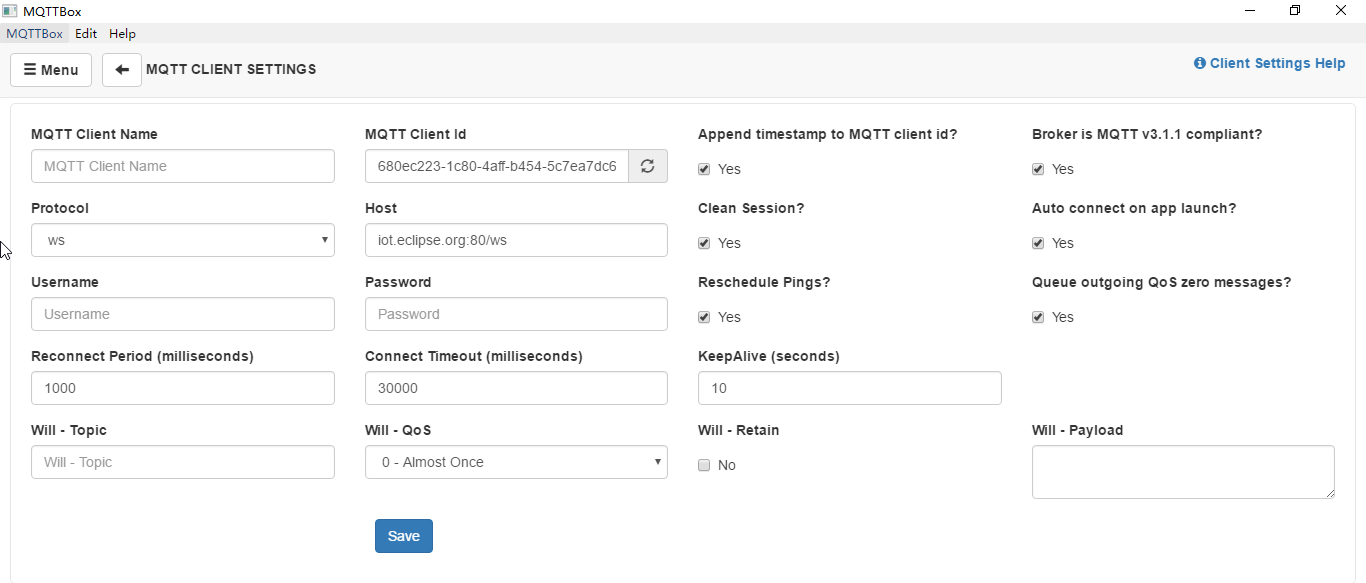
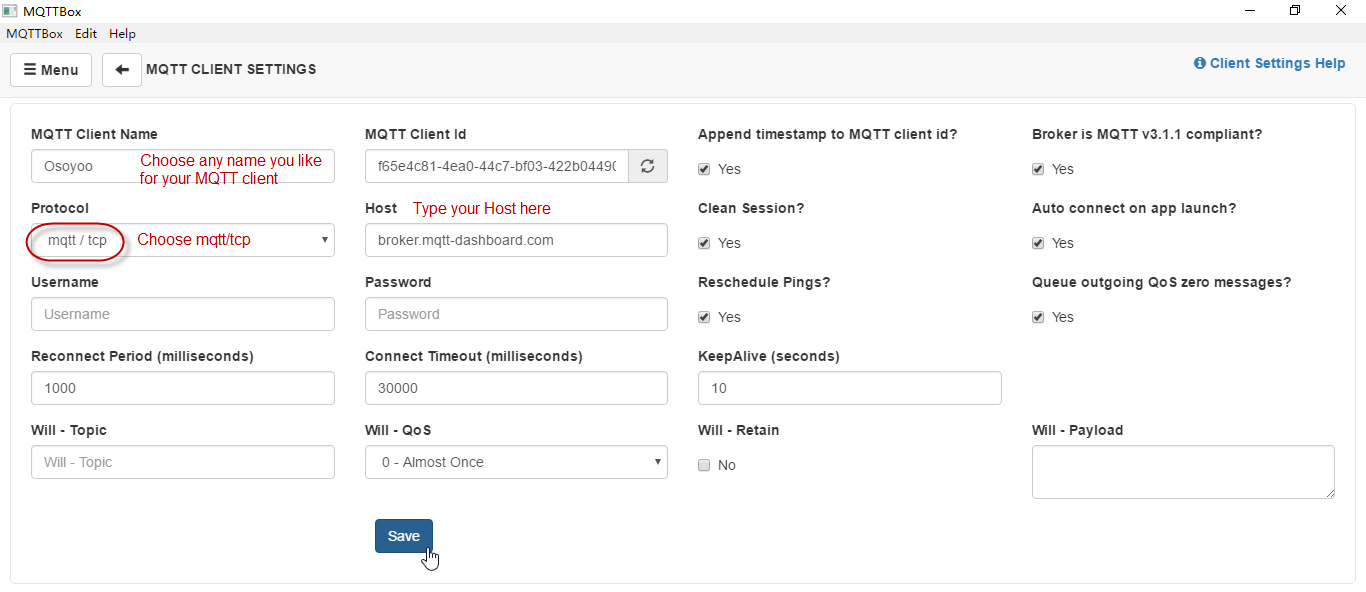
Config the MQTT CLIENT SETTINGS as below:
- MQTT Client Name ---- Choose any name you like
- Protocol ---- Choose "mqtt/tcp"
- Host --- Type your "mqtt_server" in this column,make sure it is same as your sketch.(We use "broker.mqtt-dashboard.com" here)
- Keep other settings as default
Click to save your changes.
Next, you will automatically enter the new page.If all above configration is correct,the "Not Connected" will change to "Connected" ,your MQTT client name and Host name will be displayed at the top of this page.

Topic setting:
Make sure your MQTT client publish topic is same as your Arduino sketch subscribe topic(inTopic here).
Make sure your MQTT client subscribe topic is same as your Arduino sketch publish topic(outTopic here).

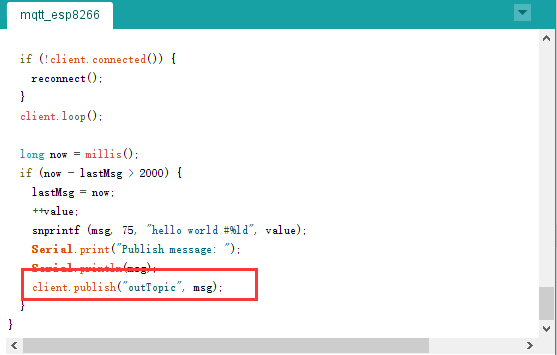
Sketch side:
Program Running Result:
Onece the upload done,if the wifi hotspot name and password setting is ok, and MQTT broker is connected, open the Serial Monitor,you will see following result:
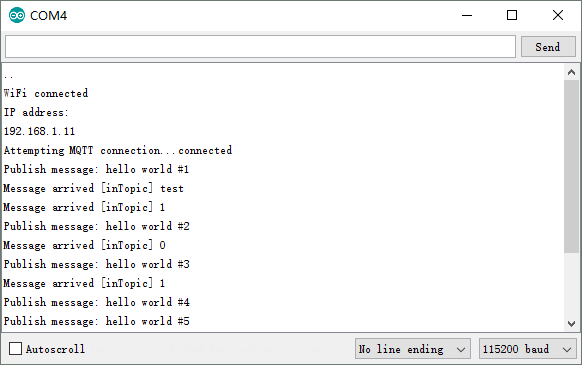
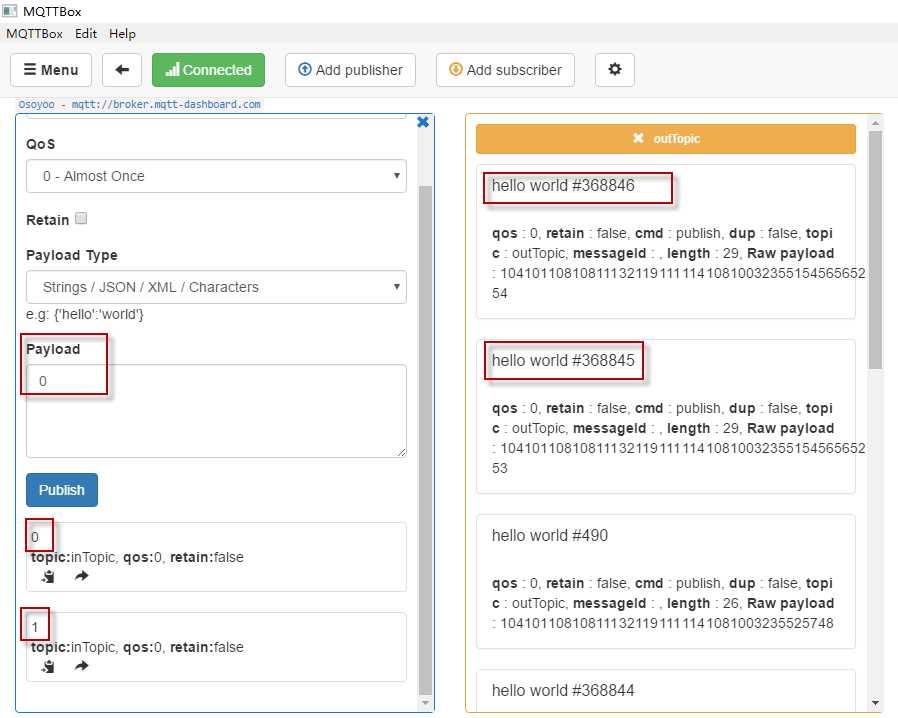
You can see the publish message "hello world" on the serial monitor.Then open the MQTT client and publish payload "1" to the topic, this NodeMCU will recevie these messages by subscribing to the "inTopic",and the LED will be lit.
Publish payload "0" to this topic,the NodeMCU LED will be turned off.
As shown in the right figure below,once click the Subscribe button of this subscribe topic,this topic will keep subscribe to the messages that published by this NodeMCU.


沒有留言:
張貼留言