NodeMCU Lesson 10 — Active Buzzer & MQTT
Introduction
In this lesson, we will show how to use a MQTT client to remote control an active buzzer via MQTT protocol.
Preparation
Hardware:
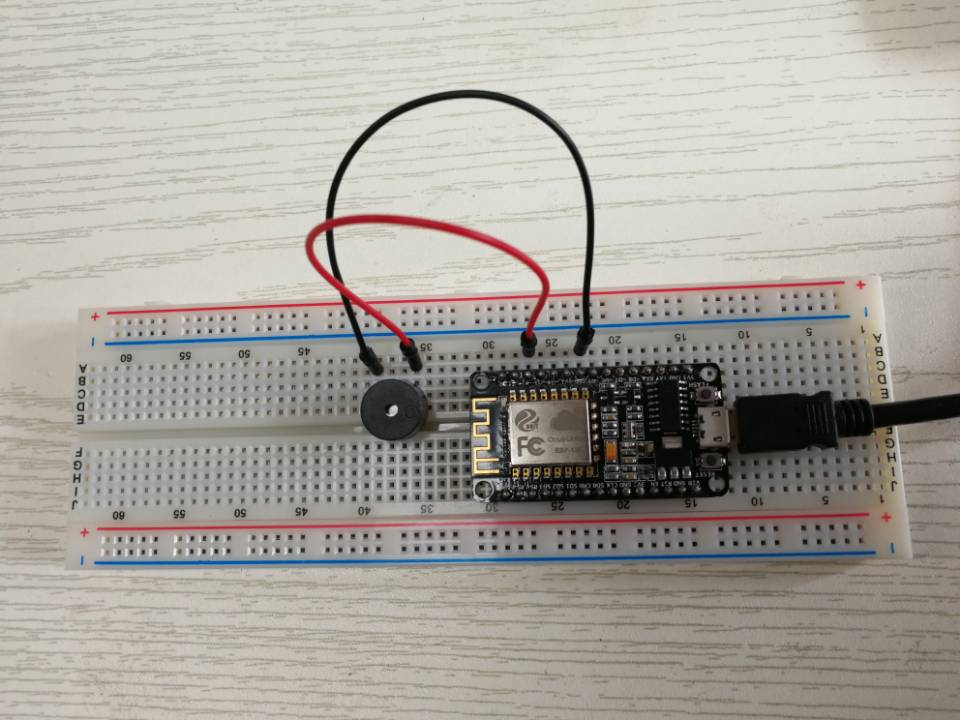
- NodeMCU board x 1
- Active Buzzer x 1
- Breadboard x 1
- Jumper wires
- Computer x 1
(You can also add a series resistor to limit the buzzer current,it will decrease beep sound.)
Software:
- Arduino IDE(version 1.6.4+)
- ESP8266 Board Package and the Serial Port Driver
- MQTT Client(MQTTBox here)
- Arduino library: PubSubClient
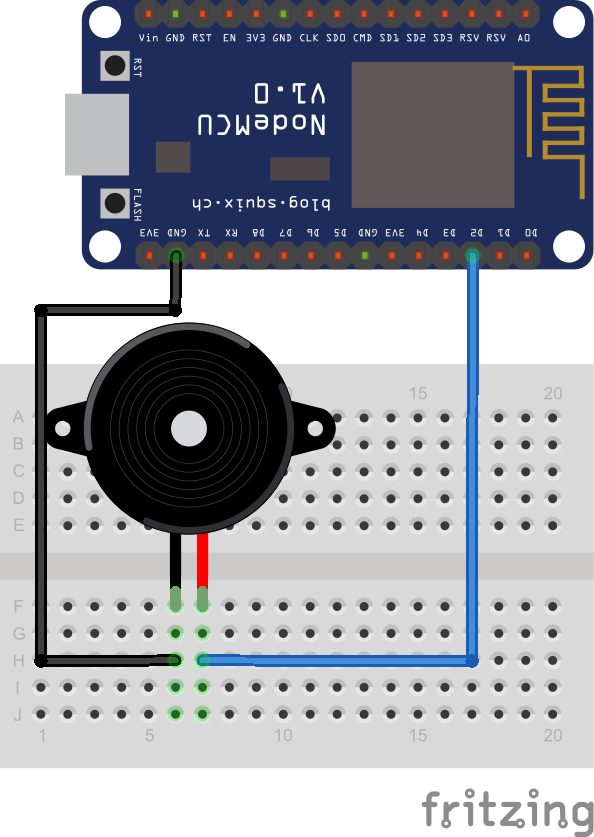
Connection
Overhere,we use D2 as the output pin to control the buzzer.
Upload Sketch
Connect the NodeMCU to computer via USB cable,open this sketch by using Arduino IDE(Version1.6.4+):
Edit the code to fit your own WiFi and MQTT settings as following operations:
1)Hotspot Configration:
const char* ssid = "your_hotspot_ssid";
const char* password = "your_hotspot_password";
Find above code line,put your own ssid and password on there.
2)MQTT Server Address Setting
const char* mqtt_server = "broker.mqtt-dashboard.com";
You can use your own MQTT broker URL or IP address to set above mqtt_server value. You can also use some famous free MQTT server to test the project such as "broker.mqtt-dashboard.com", "iot.eclipse.org" etc.
3)MQTT Client Settings
If your MQTT broker require clientID,username and password authentication,you need to change
if (client.connect(clientId.c_str()))
to
if (client.connect(clientId,userName,passWord)) //put your clientId/userName/passWord here
If not,just keep them as default.
After do that,choose the coresponding board type and port type as below,then upload the sketch to the NodeMCU.
- Board:"NodeMCU 0.9(ESP-12 Module)"
- CPU Frequency:"80MHz"
- Flash Size:"4M (3M SPIFFS)"
- Upload Speed:"115200"
- Port: Choose your own Serial Port for your NodeMCU

MQTT Client Settings
About how to config the MQTT client,check this link.
Topics Settings:
- Topic to publish: OsoyooCommand
Running Result
Onece the upload done,if wifi hotspot ssid and password setting is ok and MQTT broker is connected, open the Serial Monitor,you will see following result: the NodeMCU serial port will show the IP address and the connection satatus.

Next,open the MQTT client and publish "1" or "0" on the "OsoyooCommand" topic as below: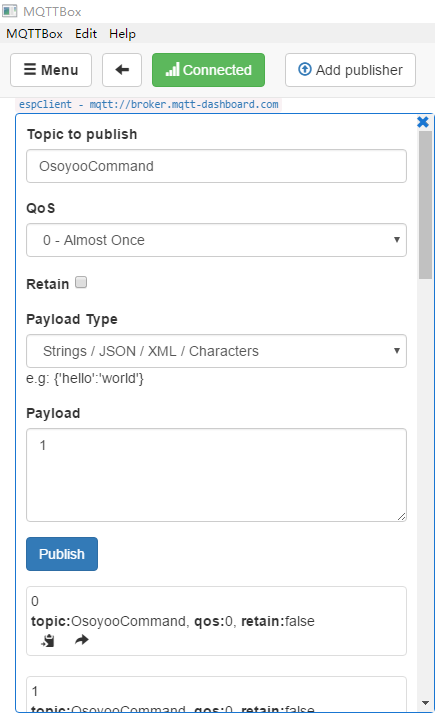
Then you will see the NodeMCU serial output. When you publish "1", the NodeMCU will subscribe this message and print "Command from MQTT broker is : [OsoyooCommand Turn On Buzzer" on the serial monitor,the buzzer will beep; When you publish "0", the NodeMCU will subscribe this message and print "Command from MQTT broker is : [OsoyooCommand Turn Off Buzzer",the buzzer will be turned off.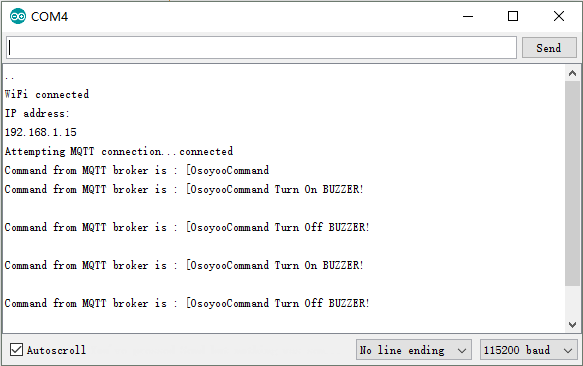


請問ESP8266所接的Buzzer有限定用哪種電壓嗎?3V還是5V?
回覆刪除