Introduction
In lesson 3,we have learned how to control the LED blink for every second,do you want to control the LED yourself by using a button?In this lesson,we will tell you how to realize it.When pressed the button,the LED was lighten and turn off when released.
Preparation:
- NodeMCU x1
- Push Button x1
- LED x1
- 10 K ohm Resistor x1
- 200 ohm Resistor x1
- Bread Board x1
- PC x1
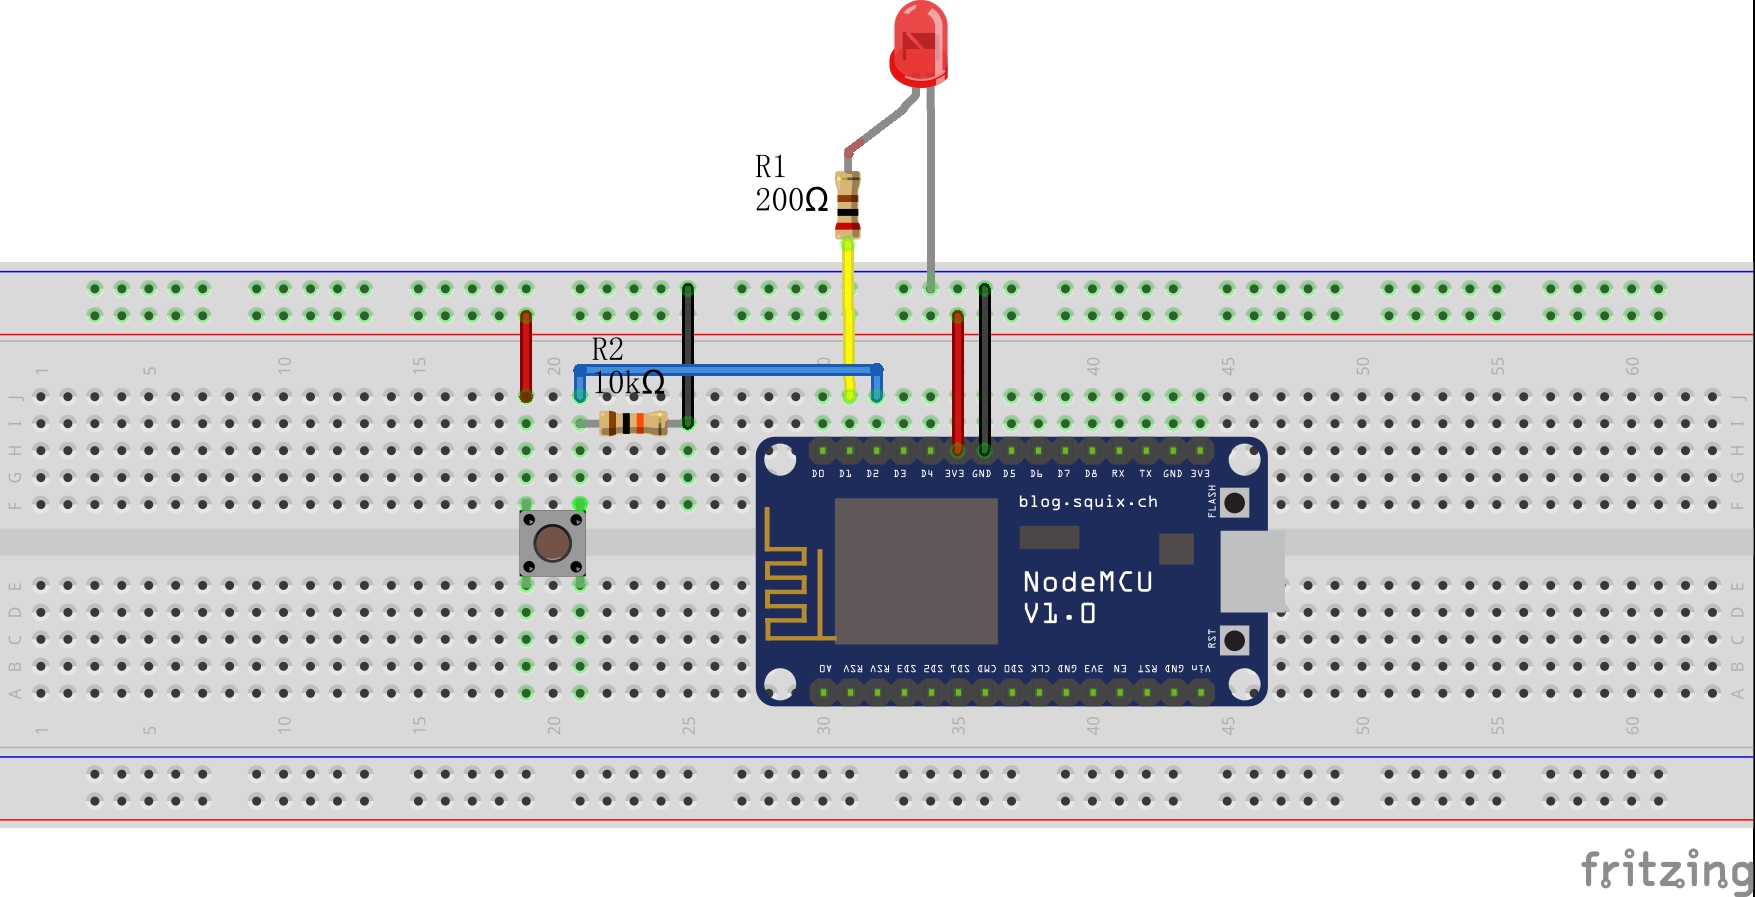
Connection:
Upload sketch
Copy below code to your Arduino IDE:
int ledpin = 5; // D1(gpio5)
int button = 4; //D2(gpio4)
int buttonState=0;
void setup() {
 pinMode(ledpin, OUTPUT);
 pinMode(button, INPUT);
}
void loop() {
 buttonState=digitalRead(button); // put your main code here, to run repeatedly:
 if (buttonState == 1)
 {
 digitalWrite(ledpin, HIGH);
 delay(200);
 }
 if (buttonState==0)
 {
 digitalWrite(ledpin, LOW);
 delay(200);
 }
}
Choose the corresponding board type and port type for your project,upload the sketch to the NodeMCU.
Program Running Result
After upload done,you will see the program running results:
when the button switch is pressed, LED light up; when the switch is released, the LED goes out.
The Expansion Example:
After the routine above done, you might think, if we want to turn on the LED in this way, the hand cannot leave button, it is not convenient.How to control the lights as normal , click on the light, then press out? We can improve the program, which can realize the result that will modify the program for the following code, and then uploaded to the NodeMCU controller.
The connection is same as above.
#define LED 5 // D1(gpio5)
#define BUTTON 4 //D2(gpio4)
//Let's say you have your push button on pin 4
int switchState = 0; // actual read value from pin4
int oldSwitchState = 0; // last read value from pin4
int lightsOn = 0; // is the switch on = 1 or off = 0

void setup() {
 pinMode(BUTTON, INPUT); // push button
 pinMode(LED, OUTPUT); // anything you want to control using a switch e.g. a Led
}
void loop() {
 switchState = digitalRead(BUTTON); // read the pushButton State
 if (switchState != oldSwitchState) // catch change
 {
 oldSwitchState = switchState;
 if (switchState == HIGH)
 {
 // toggle
 lightsOn = !lightsOn;
 }
 }
 if(lightsOn)
 {
 digitalWrite(LED, HIGH); // set the LED on
 } else {
 digitalWrite(LED, LOW); // set the LED off
 }
 }
After the program is compiled and uploaded, you can achieve: click the button to turn on the LED, and then press this button, the LED will be turned off.
static const uint8_t D0   = 16;
static const uint8_t D1   = 5;
static const uint8_t D2   = 4;
static const uint8_t D3   = 0;
static const uint8_t D4   = 2;
static const uint8_t D5   = 14;
static const uint8_t D6   = 12;
static const uint8_t D7   = 13;
static const uint8_t D8   = 15;
static const uint8_t D9   = 3;
static const uint8_t D10  = 1;


沒有留言:
張貼留言