Temperature Condition Tweet & IFTTT Google Drive Example with Wemos
PROJECT INFO
Difficulty: Easy
Estimated time: 30 minutes
License: GPL3+
Estimated time: 30 minutes
License: GPL3+
THINGS USED IN THE PROJECT
Hardware components:
Software apps and online services:
Hand tools and fabrication machines:
- Soldering iron (optional)
STORY
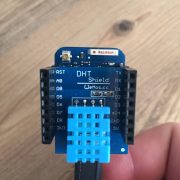
This project performs collection of temperature and humidity values produced by DHT 11 sensor and further visualization on the real-time web dashboard. Collected data is pushed via MQTT to IoT-Ignite platform for storage and visualization.
IoT-Ignite is an open platform that allows you to monitor and control IoT devices. It is free for both personal usage and startups.
 Once you complete this tutorial you will be able to receive a notification if the temperature or humidity exceeds a specified threshold. You can enable or disable alarms, compare current temperature or humidity against the thresholds, and publish an event to the IoT-Ignite if thresholds are exceeded.
An IFTTT recipe watches the IoT-Ignite for one of these alarm events and sends a text if/when an alarm is published.
This project is a quick, simple temp/humidity monitor and it can be useful for a baby’s room, server room etc.
Data flow
The DHT11 sensor is connected to Wemos board (or NodeMCU). Wemos connects to the WiFi network using ESP8266, and then pushes data to IoT-Ignite server via MQTT protocol. Data is visualized using built-in customizable dashboard. The application that is running on Wemos is written using Arduino SDK which is quite simple.
Configuration
If you are already familiar with basics of Arduino programming using Arduino IDE, you can skip the following step and proceed with step 2.
Step 1. Arduino IDE
In order to start programming WeMos, you should install Arduino IDE and all related software.
Download and install Arduino IDE.
To learn how to connect your board to the computer and upload your first sketch, please follow this guide.
Download and install Arduino IDE.
To learn how to connect your board to the computer and upload your first sketch, please follow this guide.
Step 2. Install Arduino libraries
Open Arduino IDE and go to Sketch -> Include Library -> Manage Libraries. Find and install the following libraries:
Step 3. Prepare and upload sketch.
Download the sketch from github and open with Arduino IDE.
You need to edit the following constants and variables in the sketch:
- DHTPIN D4 – WeMos DHT pin where sensor is connected to
#define DHTPIN D4 // what digital pin we're connected to- WLAN_SSID – name of your access point
- WLAN_PASS – access point password
#define WLAN_SSID "GUEST"
#define WLAN_PASS "12345"
MQTT Server – HOST/IP address that is accessible within your Wi-Fi network.
- ARB_USERNAME – username of MQTT account
- ARB_PW – password of MQTT account
- DEVICE_ID – a unieqe ID for WeMos
- NODE_ID – name of node
#define ARB_SERVER "mqtt.ardich.com"
#define ARB_SERVERPORT 8883 // use 8883 for SSL
#define ARB_USERNAME "mqttuser"
#define ARB_PW "a12345678"
- delayTime – next time to contact the server
//Wait 20 seconds before sending data to IoT-Ignite
int delayTime = 20000;
Connect your WeMos device via USB cable and select “WeMos” port in Arduino IDE. Compile and Upload your sketch to device using “Upload” button.

After application is uploaded and started it will try to connect to IoT-Ignite node using MQTT client and upload “temperature” and “humidity” time series data.
Step 4. IoT Ignite Developer Zone
- Register and login free developer account at:
https://devzone.iot-ignite.com/dpanel/login.php?page=development , - After your code is uploaded, it time to configure for sensor types. Login your Enterprise panel;
https://enterprise.iot-ignite.com/


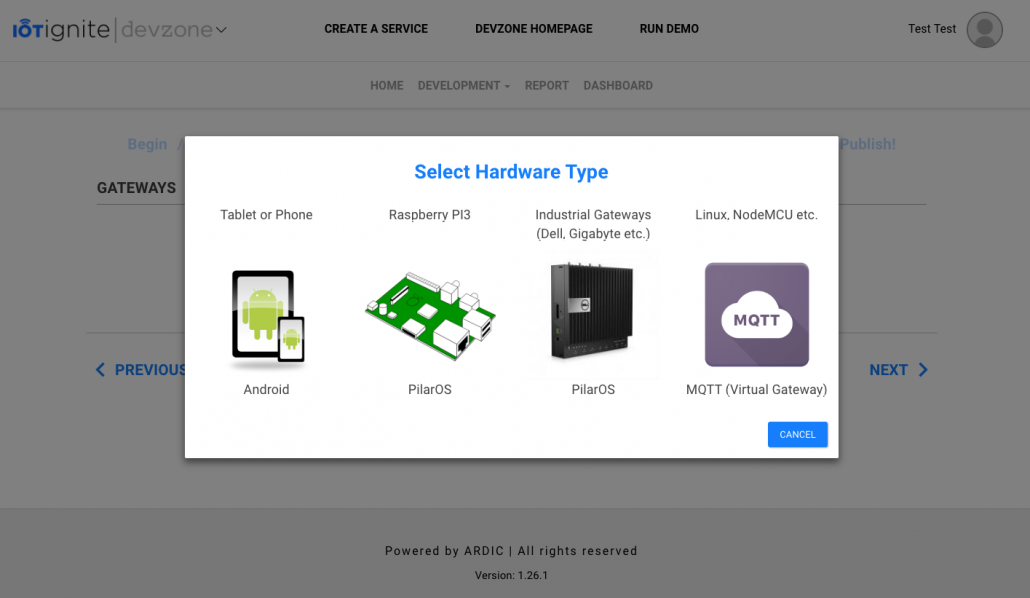
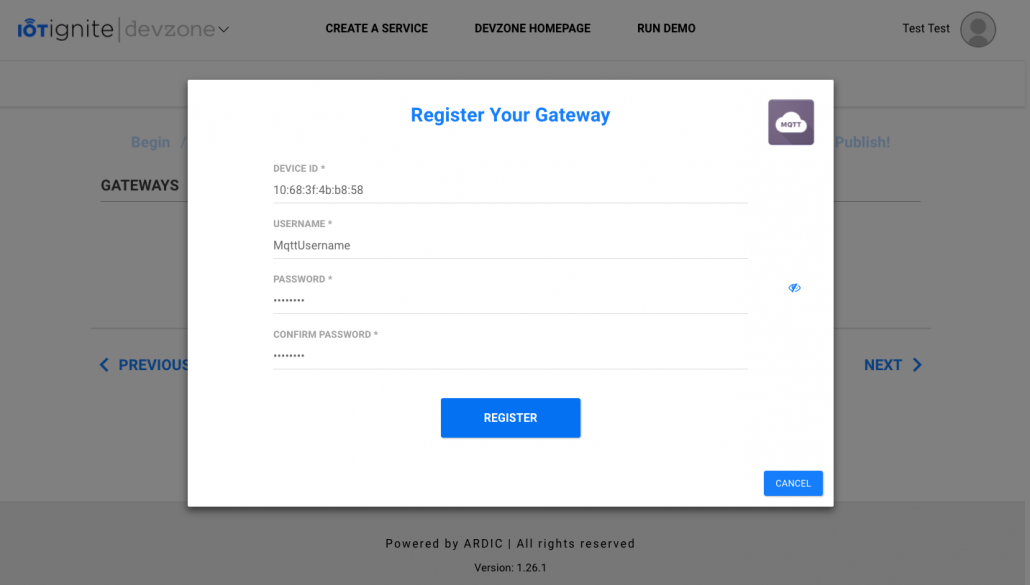
Sensor Configuration
Please select “IoT Configuration > Gateway Inventory and Sensor Tab”

- Temperature Sensor
Type for Sensor ID “DHT11 Temp” and then select sensor type from list “Temperature(DHT 11 Temperature and Humidity)”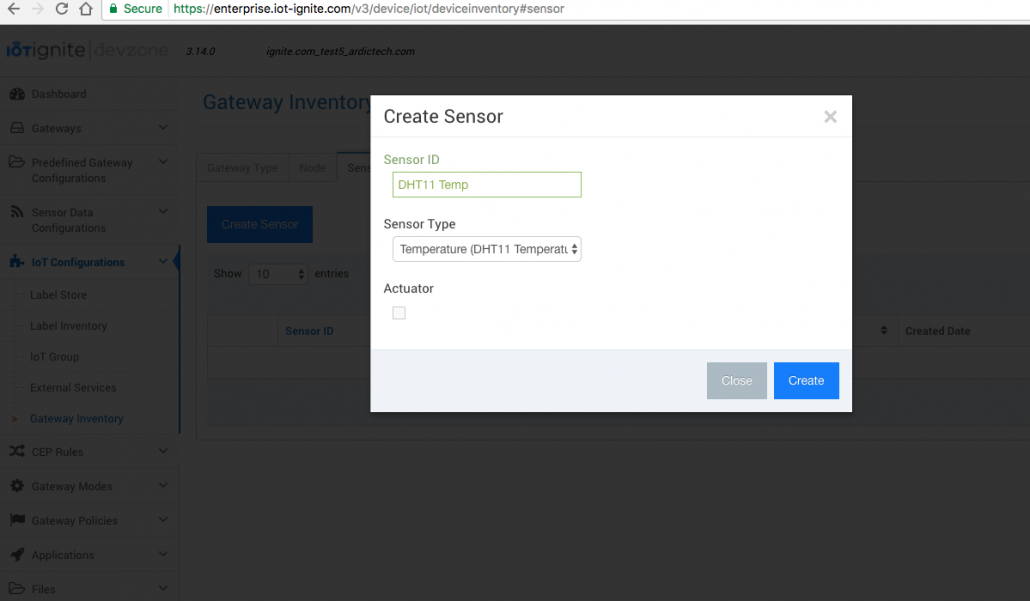
- Humidity Sensor
Type for Sensor ID “DHT11 Hum” and then select sensor type from list “Humidity(DHT 11 Temperature and Humidity)”

Node Configuration
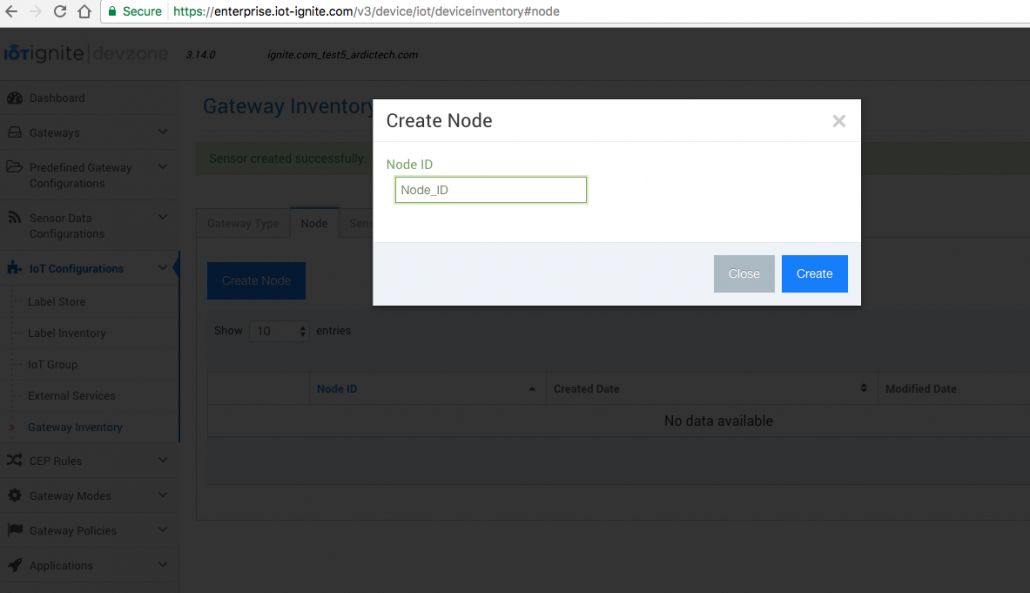
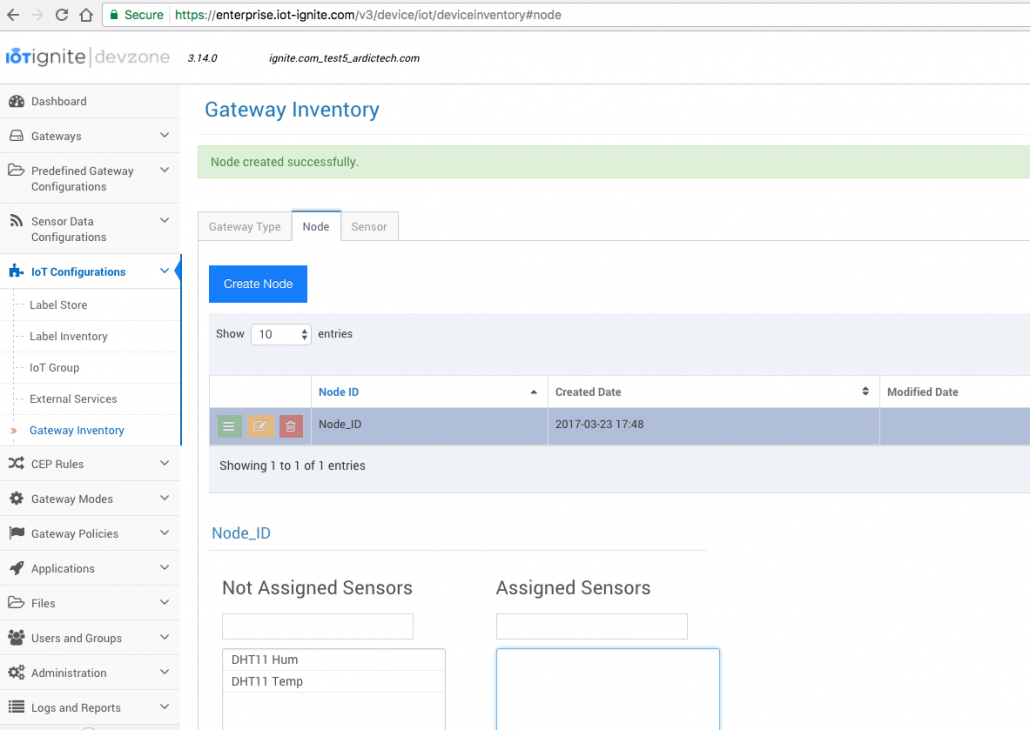
Please select “IoT Configuration > Gateway Inventory and Node Tab”
Type for Node ID “Node_ID” and click yellow button for assigning sensors. Choose added sensor “DHT11 Hum” and “DHT11 Temp” and save.
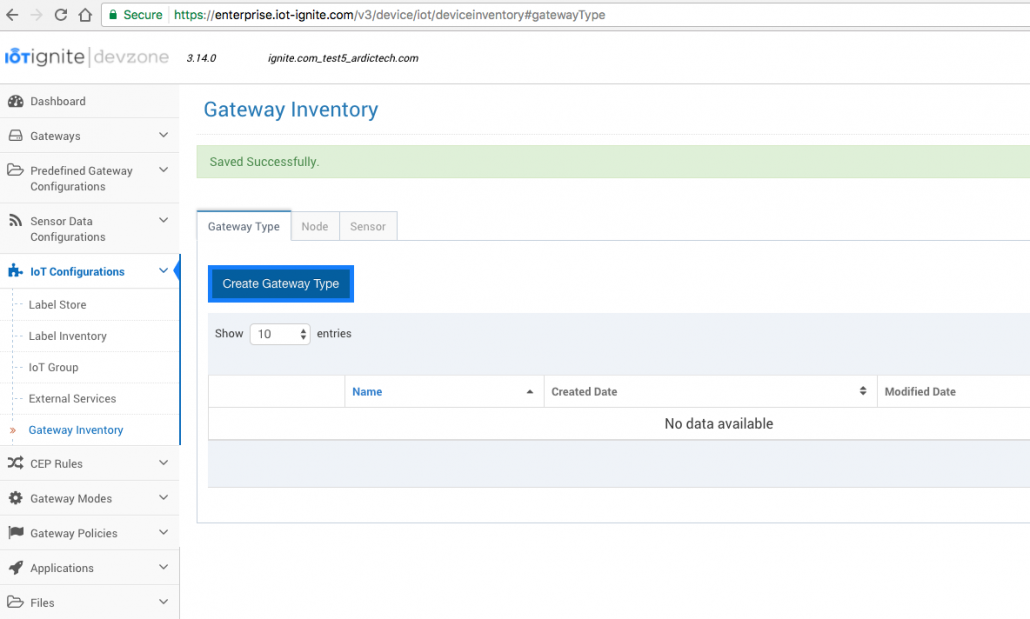
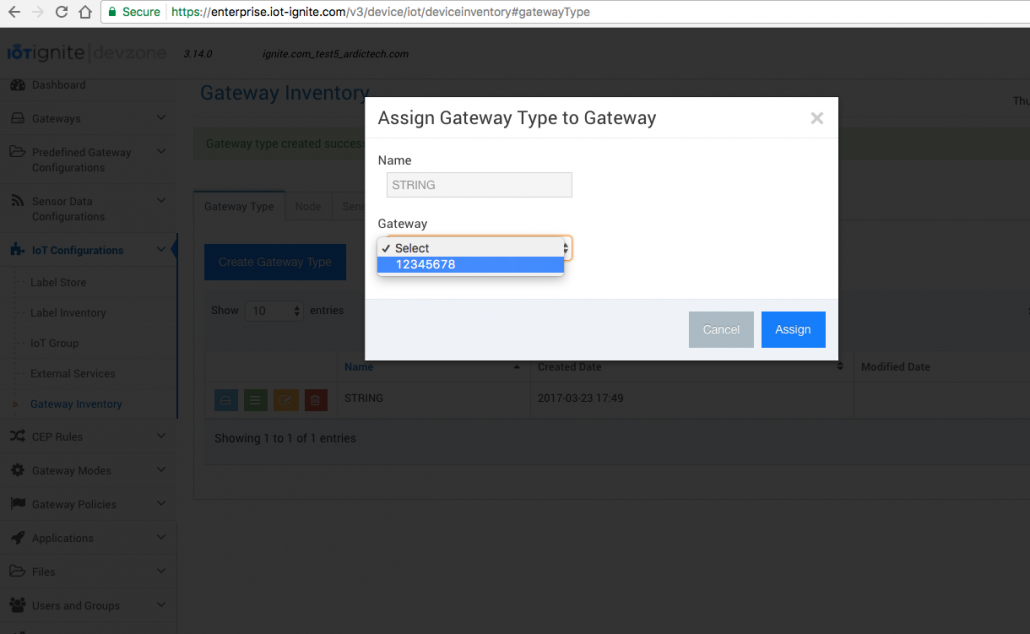
Gateway Inventory
Please select “IoT Configuration > Gateway Inventory”
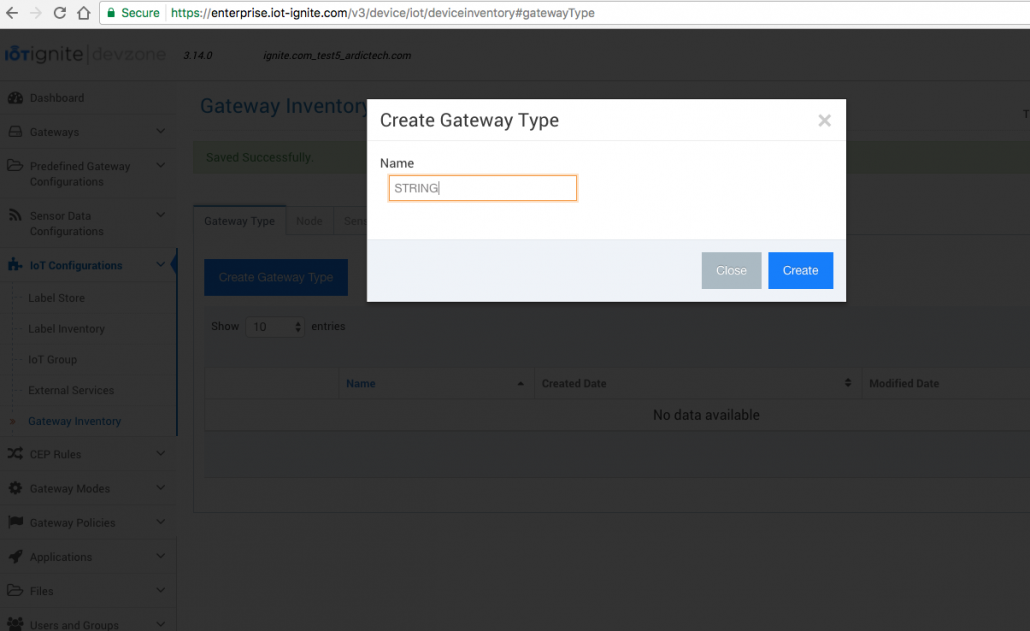
Click “Create Gateway Type” link and type name “STRING” and save button.
Click green button for assigning for node. Select created node for assign and save button.
Click blue button for assign gateway type to gateway, select created gateway and click assign button.
 Step 5. Play Time: Devzone Dashboard – Report
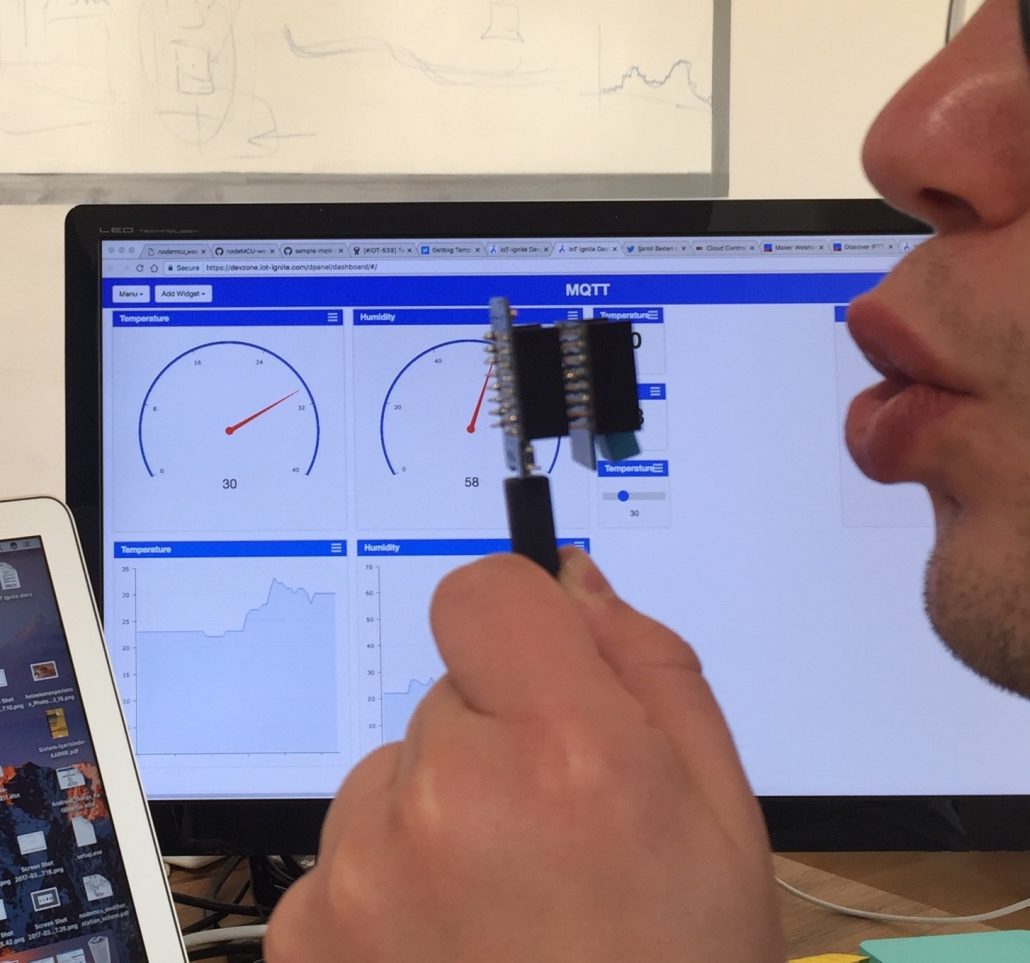
Devzone has two visual reporting tools. You can use either report or dashboard tool. Report tab is simple data listing and visualization tool.
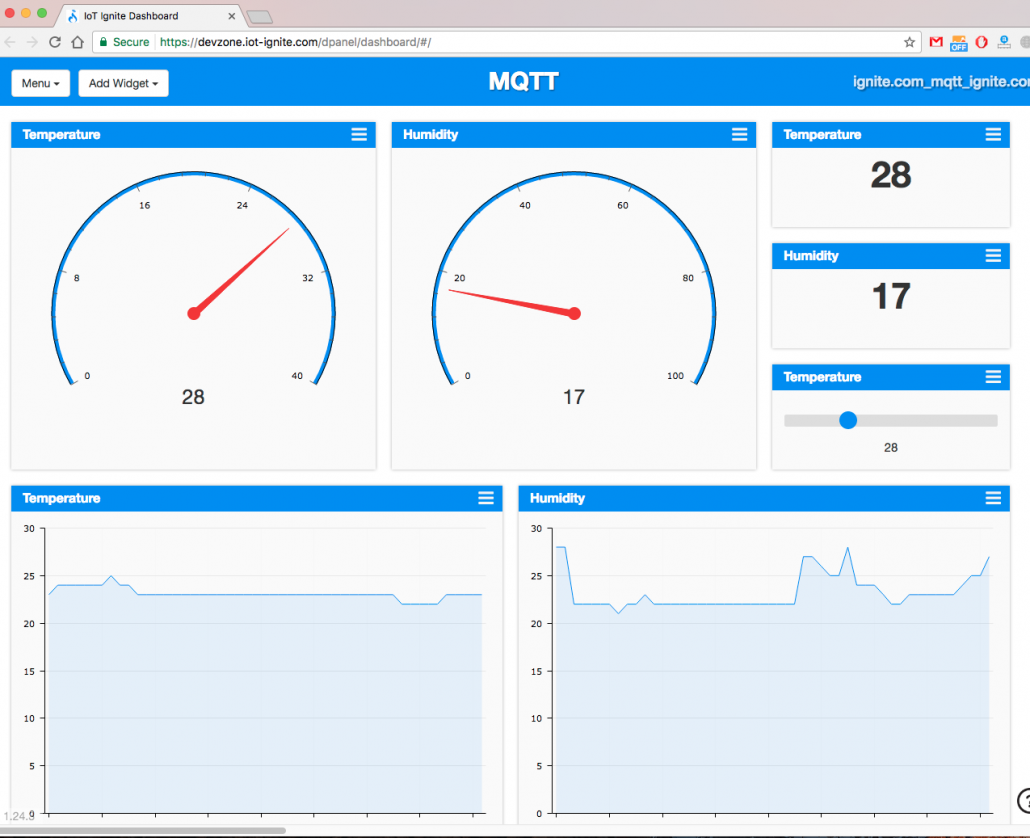
Dashboard gets sensor data in nearly real-time and interactive. You can visualize your data in minutes using the intuitive drag & drop interface. When you open dashboard, you can use various type of tool and you can play configuration options.
There are additional facilities:
- Every board is built upon a secure, high-performance, enterprise-class cloud system.
- Every dashboard has a unique URL that you can share.
Step 6. IFTT Connection – Google Drive Integration
Follow: IoT Configurations > External Services step;
- Login your IFTTT account, and create Maker Channel API and copy the key,
- Paste the API key information and go to CEP Rules > Cloud Rules menu,
- Click New Cloud Rule button and setup rule configuration for data exchange,
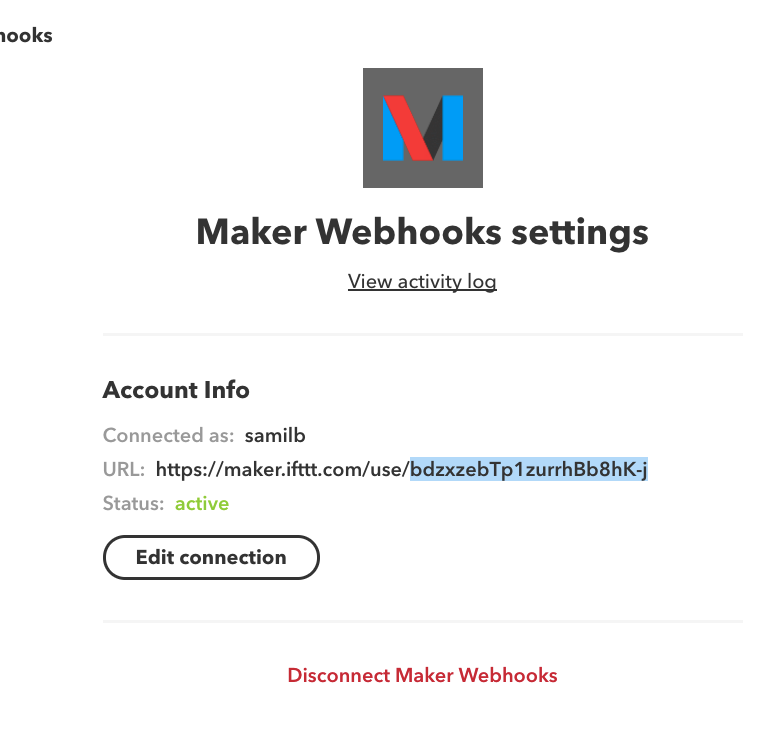
- Go IFTTT account and create applet with you maker channel and google drive channel.
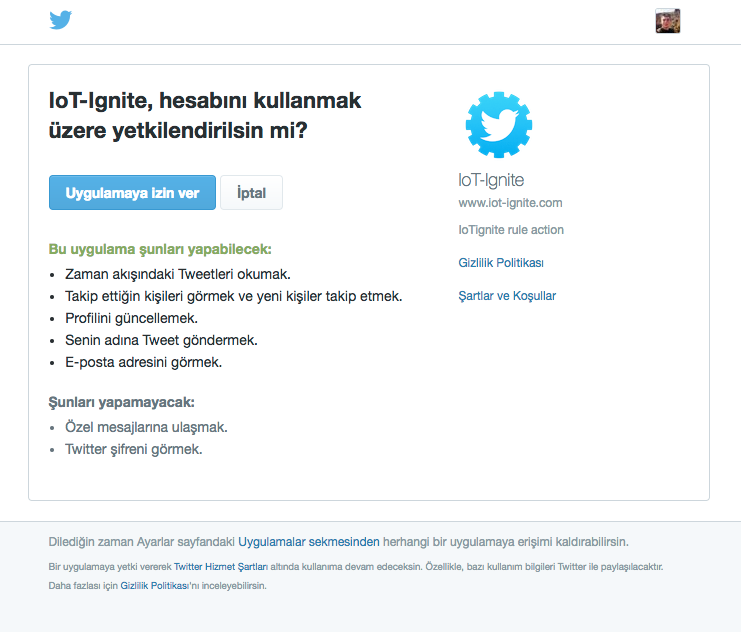
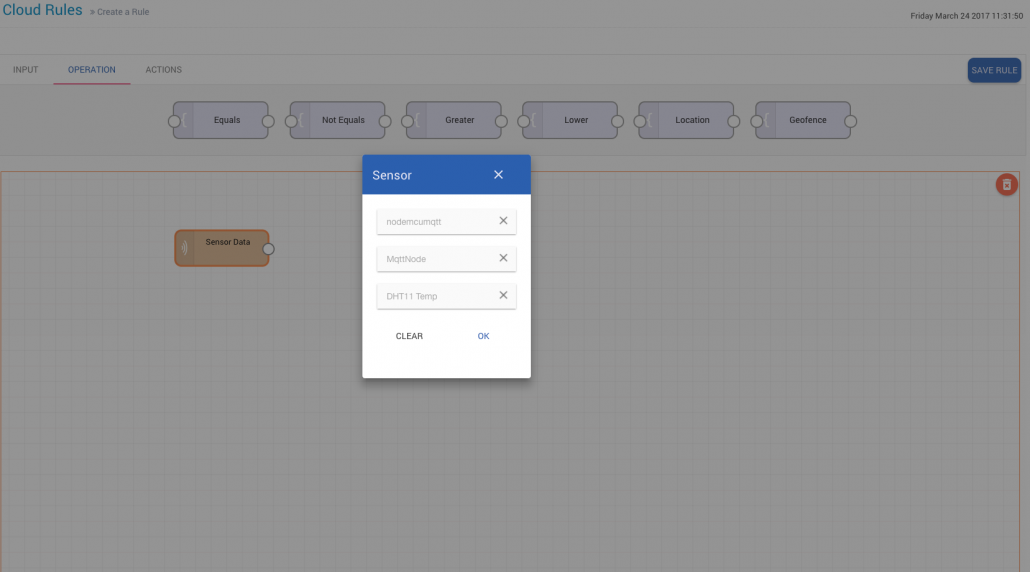
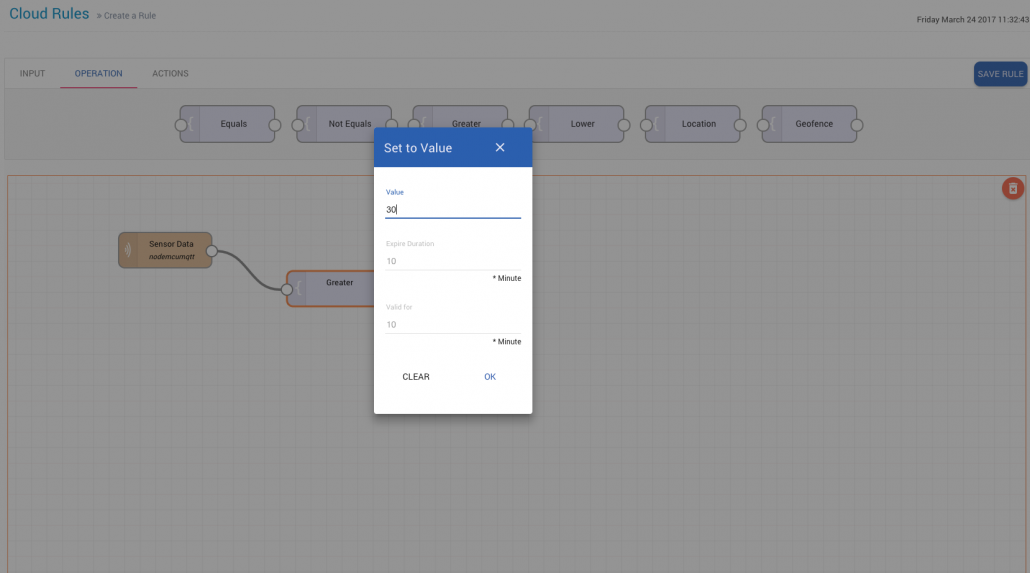
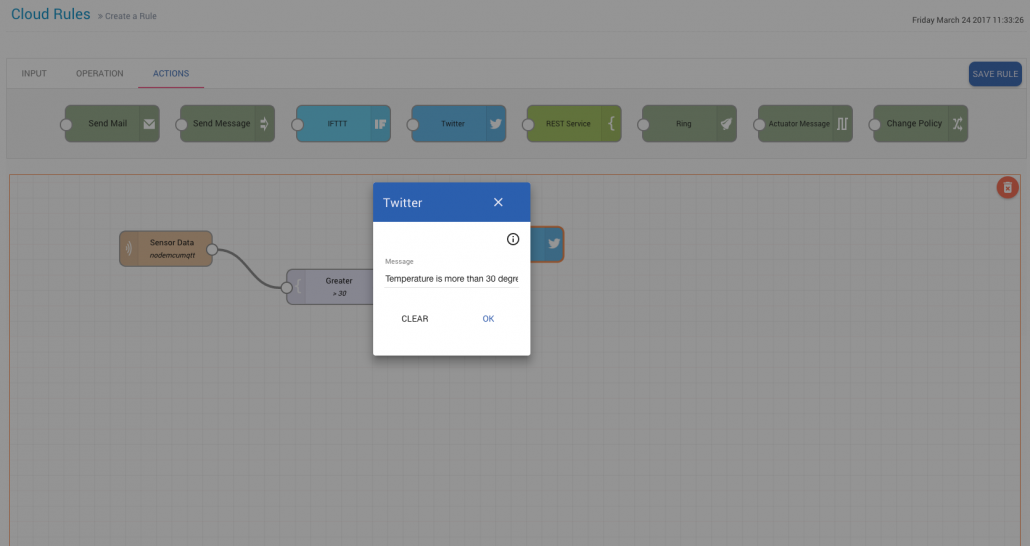
Step 7. Twitter Connection
Follow: IoT Configurations > External Services and Twitter Tab;
- Click connect button than login your Twitter account, and allow IoT-Ignite application.
- Go CEP Rules > Cloud Rules menu,
- Click New Cloud Rule button and setup rule configuration for tweet,
- Add new rule for temperature and test!

Github Code
You can access the project files on github.


沒有留言:
張貼留言