ESP8266/ESP32 Connect WiFi Made Easy
No need pre-coded SSID & password
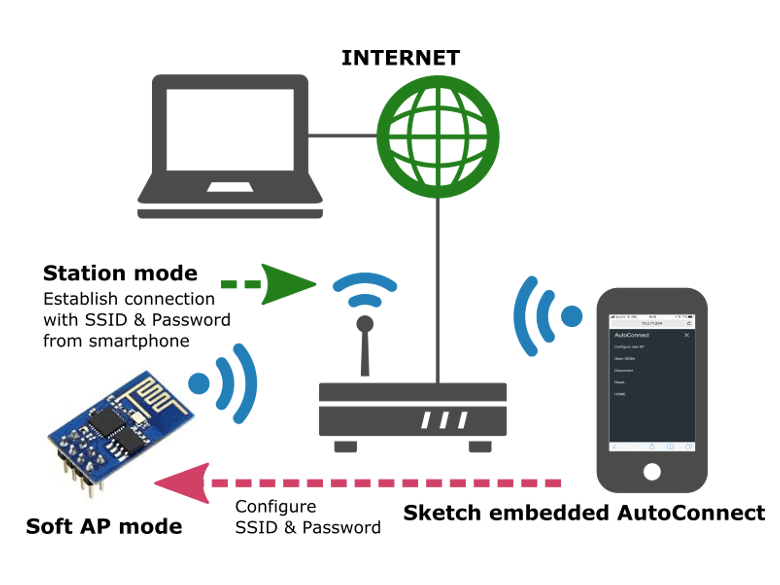
It is no needed hard-coding in advance the SSID and Password into the sketch to connect between ESP8266/ESP32 and WLAN. You can input SSID & Password from a smartphone via the web interface at runtime.
Simple usage
AutoConnect control screen will be displayed automatically for establishing new connections. It aids by the captive portal when vested the connection cannot be detected.By using the AutoConnect menu, to manage the connections convenient.
Store the established connection
The connection authentication data as credentials are saved automatically in EEPROM of ESP8266/ESP32 and You can select the past SSID from the AutoConnect menu.
Easy to embed in
AutoConnect can be embedded easily into your sketch, just "begin" and "handleClient". The AutoConnect API is the same for between ESP8266 and ESP32.
Lives with the your sketches
The sketches which provide the web page using ESP8266WebServer for ESP8266 or WebServer for ESP32 there is, AutoConnect will not disturb it. AutoConnect can use an already instantiated ESP8266WebServer or WebServer object, or itself can assign it.
Step #1 - InstallationArduino IDE
The current upstream at the 1.8 level or later is needed. Please install from the official Arduino IDE download page.
ESP8266 Arduino core
This library as the AutoConnect targets sketches made on the assumption of ESP8266 Community's Arduino core. Install third-party platform using the Boards Manager of Arduino IDE. The package URL is http://arduino.esp8266.com/stable/package_esp8266com_index.json
It can be introduced according to the following procedure.
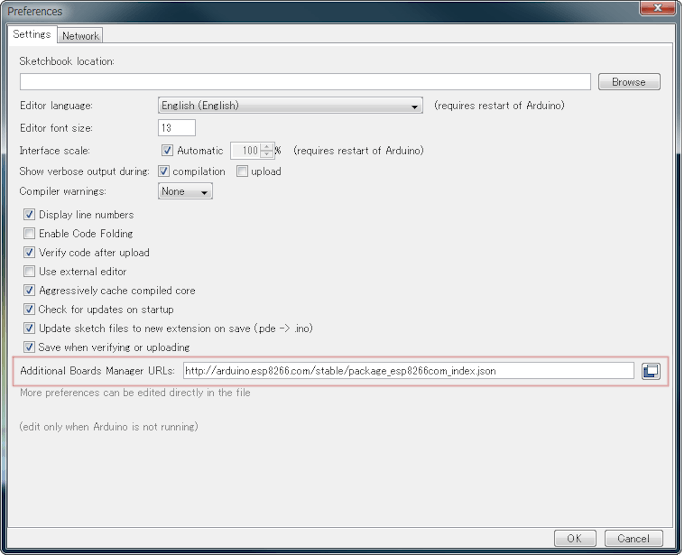
- Open Arduino IDE, Go menu [File] > [Preference]
- Enter the [Additional Boards Manager URLs:] as http://arduino.esp8266.com/stable/package_esp8266com_index.json
- Click OK.
If you want to use both ESP8266 and ESP32, add multiple URLs into Additional Board Manager URLs field, separating them with commas. The arduino-esp32 core package URL is https://dl.espressif.com/dl/package_esp32_index.json
Install the AutoConnect library
AutoConnect is available on the Arduino IDE Library manager. You can install the AutoConnect library from it easily.
- On Arduino IDE, Go menu [Sketch] -> [Include Library] -> [Manage Libraries...]
- Then pop up the Library manager, choose [Topic] and [Communication] from drop down list.
- Enter the Filter: AutoConnect.
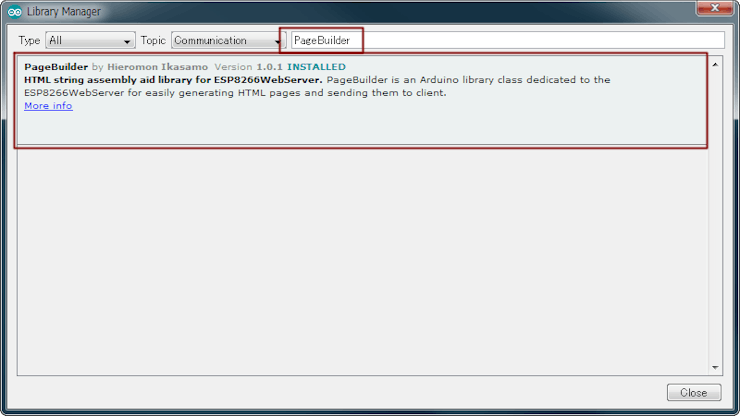
- Library manager will show the like as display below.
- Select a latest version, click [Install].

You also need an additional library called PageBuilder. It can be installed from the library manager too, the procedure is same as the above. It's [Communication] for [Topic], Filter is [PageBuilder].
Upload the sketch
Open the Arduino IDE, wrtie the "simple.ino" sketch and upload it. The feature of this sketch is that the SSID and Password are not coded.
#include <ESP8266WiFi.h>
#include <ESP8266WebServer.h>
#include <AutoConnect.h>
ESP8266WebServer Server;
AutoConnect      Portal(Server);
void rootPage() {
  char content[] = "Hello, world";
  Server.send(200, "text/plain", content);
}
void setup() {
  delay(1000);
  Serial.begin(115200);
  Serial.println();
  Server.on("/", rootPage);
  if (Portal.begin()) {
    Serial.println("HTTP server:" + WiFi.localIP().toString());
  }
}
void loop() {
  Portal.handleClient();
}
The above code assumes ESP8266. The include directives and ESP8266WebServer class can be modified and applied to ESP32 as follows.
#include <WiFi.h>
#include <WebServer.h>
WerServer Server;
Run at first
Once reset the ESP8266, starts it. After about 30 seconds, please take the smartphone and open Wi-Fi setting Apps. You can see the esp8266ap in the list of "CHOOSE A NETWORK...". Then tap the esp8266ap and enter password 12345678, a something screen pops up automatically as shown below.


沒有留言:
張貼留言