

https://pigreekblog.wordpress.com/2016/12/11/part-2temperature-sensor-ds18b20-with-arduino-mysql/
![[Part 2]Temperature sensor DS18b20 with Arduino – MySQL](https://pigreekblog.files.wordpress.com/2016/12/capture-d_ecc81cran-2016-12-11-acc80-09-14-32.png?w=628&h=251&crop=1)
[Part 2]Temperature sensor DS18b20 with Arduino – MySQL
Now that we know how to read the temperature from our DS18B20 sensor, it’s time to save this data to a MySQL server.
I would like to point out that for this tutorial, I will not use a PHP page to send and save the temperatures to the SQL server. Here, only a simple request will be used.
I have chosen to use a Raspberry Pi Zero and a Mysql server all that is most normal. I also replaced my Arduino Nano with an ESP8266 12-E Dev Board for logical questions.
Install MySQL server:
I start by installing the MySQL server on the Pi raspberry using the following command.
sudo apt-get install mysql-server mysql-client python-mysqldb
When it is done, I edit the configuration file to allow connection to the outside.
sudo nano /etc/mysql/my.cnf

[mysqld]
user            = mysql
pid-file        = /var/run/mysqld/mysqld.pid
socket          = /var/run/mysqld/mysqld.sock
port            = 3306
basedir         = /usr
datadir         = /var/lib/mysql
tmpdir          = /tmp
language        = /usr/share/mysql/English
# bind-address    = 127.0.0.1
# skip-networking (it can be share-networking in new version)
And restart
sudo /etc/init.d/mysql restart
I then install Emma, which is a Graphical Toolkit for Mysql just to add a new user and edit rights
sudo apt-get install emma
I could have used the command lines, but I must confess that I am not very comfortable with this yet.
Here i need to add 2 users :
- 192.168.1.1 which is the IP address of my Mac that I use to see the data.
- 192.168.1.5 which is the IP address of the ESP8266 so that it can send the temperature to the SQL server.
INSERT INTO `user` (`Host`, `User`, `Password`, `Select_priv`, `Insert_priv`, `Update_priv`, `Delete_priv`, `Create_priv`, `Drop_priv`, `Reload_priv`, `Shutdown_priv`, `Process_priv`, `File_priv`, `Grant_priv`, `References_priv`, `Index_priv`, `Alter_priv`, `Show_db_priv`, `Super_priv`, `Create_tmp_table_priv`, `Lock_tables_priv`, `Execute_priv`, `Repl_slave_priv`, `Repl_client_priv`, `Create_view_priv`, `Show_view_priv`, `Create_routine_priv`, `Alter_routine_priv`, `Create_user_priv`, `Event_priv`, `Trigger_priv`, `Create_tablespace_priv`, `ssl_type`, `ssl_cipher`, `x509_issuer`, `x509_subject`, `max_questions`, `max_updates`, `max_connections`, `max_user_connections`, `plugin`, `authentication_string`)
VALUES
(X'192.168.1.1', X'PiGreek', X'MY_PASSWORD', 'Y', 'Y', 'Y', 'Y', 'Y', 'Y', 'Y', 'Y', 'Y', 'Y', 'Y', 'Y', 'Y', 'Y', 'Y', 'Y', 'Y', 'Y', 'Y', 'Y', 'Y', 'Y', 'Y', 'Y', 'Y', 'Y', 'Y', 'Y', 'Y', '', X'', X'', X'', 0, 0, 0, 0, X'', NULL);
Now you should be able to connect to your database from a computer and the ESP8266.
Before you left, create a new database called “sensors” then a table called “room” with 3 fields :
- id
- value
- created
CREATE TABLE `room` (
`id` int(11) unsigned NOT NULL AUTO_INCREMENT,
`value` float DEFAULT NULL,
`created` datetime DEFAULT NULL,
PRIMARY KEY (`id`)
) ENGINE=InnoDB AUTO_INCREMENT=10 DEFAULT CHARSET=utf8;
Add data to a database:
Connect the ESP to your computer and start the Arduino IDE.
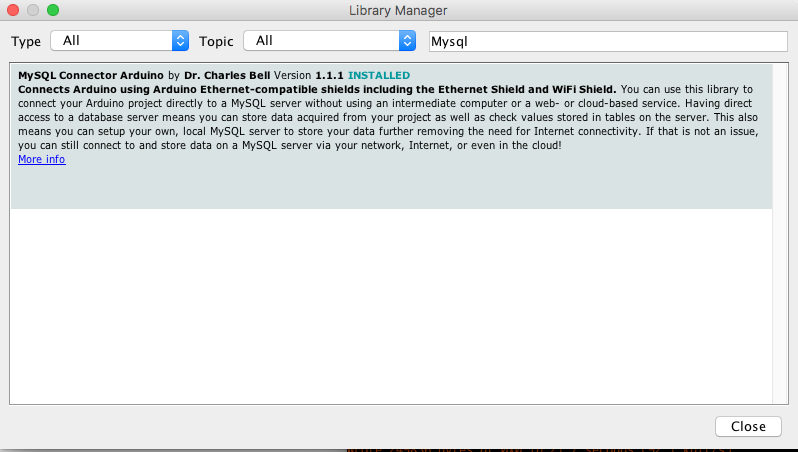
Go to Sketch -> Include Library –> Manage Library and install Mysql Connector
Start a new project and copy this code :
#include <TimeLib.h>
#include <ESP8266WiFi.h>
#include <WiFiUdp.h>
#include <WiFiClient.h>

#include <MySQL_Connection.h>
#include <MySQL_Cursor.h>

#include <OneWire.h>
#include <DallasTemperature.h>

#define ONE_WIRE_BUS 4 // DS18B20 Data Pin
OneWire oneWire(ONE_WIRE_BUS);
DallasTemperature sensors(&oneWire);

// MySQL
IPAddress server_addr(192,168,1,5);   // MySQL SERVER
char user[] = "here"; // MySQL USERNAME
char password[] = "here"; // MySQL PASSWORD
char INSERT_DATA[] = "INSERT INTO sensors.room (value, created) VALUES (%s, NOW() + INTERVAL 1 HOUR)";
char query[128];
char temperature[10];

// WiFi
char ssid[] = "here"; // SSID NAME
char pass[] = "here"; // SSID PASSWORD

WiFiClient client;
MySQL_Connection conn((Client *)&client);

void setup() {
  Serial.begin(115200);
  WiFi.begin(ssid, pass);
  sensors.begin();

  while ( WiFi.status() != WL_CONNECTED ) {
    delay ( 500 );
    Serial.print ( "." );
  }
  Serial.println ( "" );
  Serial.print ( "Connected to " );
  Serial.println ( ssid );
  Serial.print ( "IP address: " );
  Serial.println ( WiFi.localIP() );
  Serial.println("DB - Connecting...");
  while (conn.connect(server_addr, 3306, user, password) != true) {
    delay(500);
    Serial.print ( "." );
  }
}

void saveTempData() {
            sensors.requestTemperatures();
            MySQL_Cursor *cur_mem = new MySQL_Cursor(&conn);
            Serial.print("Temp
            Serial.println(sensors.getTempCByIndex(0));
            Serial.print("Query
            dtostrf(sensors.getTempCByIndex(0), 2, 2, temperature);
            sprintf(query, INSERT_DATA, temperature);
            cur_mem->execute(query);
            Serial.println(query);
            delete cur_mem;
            Serial.println("Data stored!");
            delay(2000);
 }

void loop() {
  saveTempData();
}
Edit your host/username/password of the SQL server, and your SSID/password.
Finally, upload it.
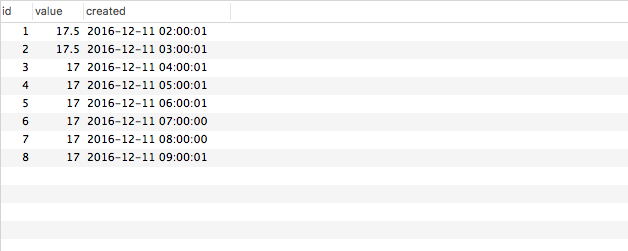
Open your serial monitor with a baud of 115200. You should see your Arduino cheking data and filling your database with temperatures every 2 seconds.
Connected to MY_SSID
IP address: ——
DB – Connecting…
Connected to server version 5.5.52-0+deb8u1
Temp: 17.50
QueryL: INSERT INTO sensors.room (value, created) VALUES (17.50, NOW() + INTERVAL 1 HOUR)
Data stored!
IP address: ——
DB – Connecting…
Connected to server version 5.5.52-0+deb8u1
Temp: 17.50
QueryL: INSERT INTO sensors.room (value, created) VALUES (17.50, NOW() + INTERVAL 1 HOUR)
Data stored!
I used NOW() + INTERVAL 1 HOUR because with no reason when i want to store the datetime, 1 hour is missing. when it’s 9:00 AM it save 8:00PM … Not sure why….
ANd it’s done ! you now know how to use an Arduino connected to Wifi sending data to a SQL server.
Have fun and see you soon for the next part of this tutorial where we will use NTP server to push data every hour without a RTC clock.


沒有留言:
張貼留言