Node-RED Hello, world! Example
源自於 http://developer.opto22.com/nodered/general/getting-started/node-red-hello-world/#next-step
Overview
While this tutorial covers a very basic example, there are a few key concepts that should be discussed first:
- Messages are objects containing data, and they flow from node to node. They are the basic mechanism by which Node-RED operates.
- Nodes either generate a new message or process an incoming message.
- Messages have properties, which are values attached to the message. Properties are basically a variable and can be numbers, strings, booleans, arrays, or objects.
- A very common message property is called the payload. Many nodes will use the payload property by default.
- Inside of a node, the message object is called simply “msg”.
- Flows are a collection of connected nodes that messages pass through.
Step 1 - Add an Inject node
First, we need a way to start the flow. That’s one of the main purposes of the Inject node—to inject a message into the flow.
- If it’s not open already, open Node-RED in your browser at port 1880.
- If using a GROOV-AR1, then open https://[groov-box-hostname]:1880.
- If using Node-RED running on your computer, you can use http://127.0.0.1:1880 or whichever address or hostname you’re using.
- If you haven’t used Node-RED before, there should be one empty flow named “Flow 1”.
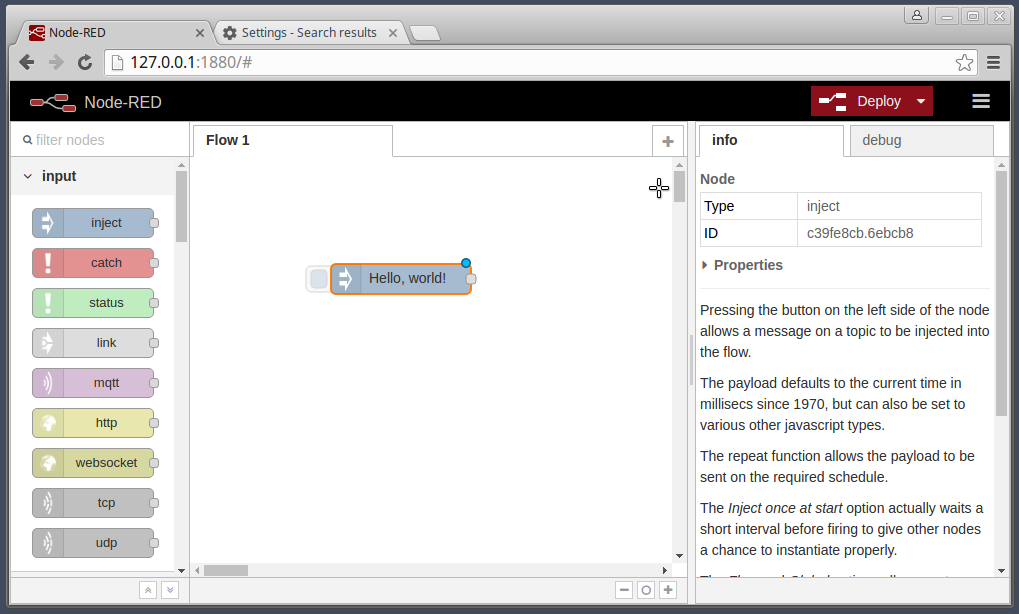
- From the node palette on the left side of the Node-RED editor, select an Inject node and drag it onto the flow.
- Double-click the node to open the “Edit inject node” view.
- For the Payload field, select string and enter Hello, world! in the text field.
- Click Done.
Later, with its
msg.payload property set to “Hello, world!” this node is going to inject a message into the flow.
Step 2 - Add a Debug node
We need a destination for the Inject node’s message. We’ll use the Debug node, which will print out our message to the debug console window.
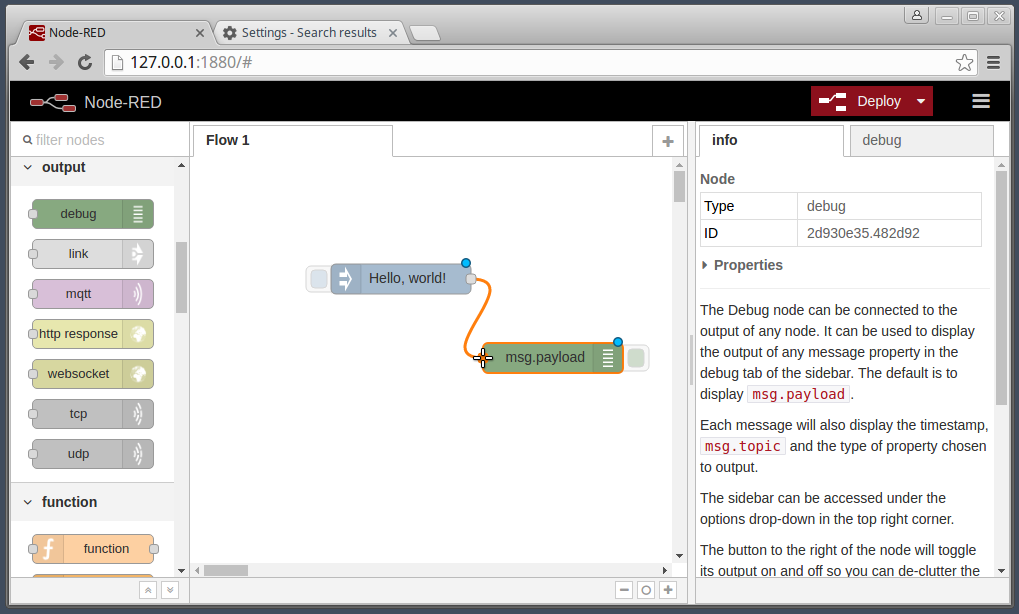
- From the node palette, select a Debug node and drag it onto the flow, and then place it to the right-hand side of the Inject node.
- Wire the nodes together. Place the mouse cursor over the Inject node’s output port (a small gray square on the right-hand side of the node), then left-click and drag a wire over to the input port of the Debug node. A gray wire should now be connecting the output of the Inject node to the input of the Debug node.
The Debug node will automatically print the
msg.payload property to the console window, which we’ll see in the next step.
Step 3 - Deploy and Run
Now that our flow is complete, we need to deploy it to the server and run it.
- Click the Deploy button.
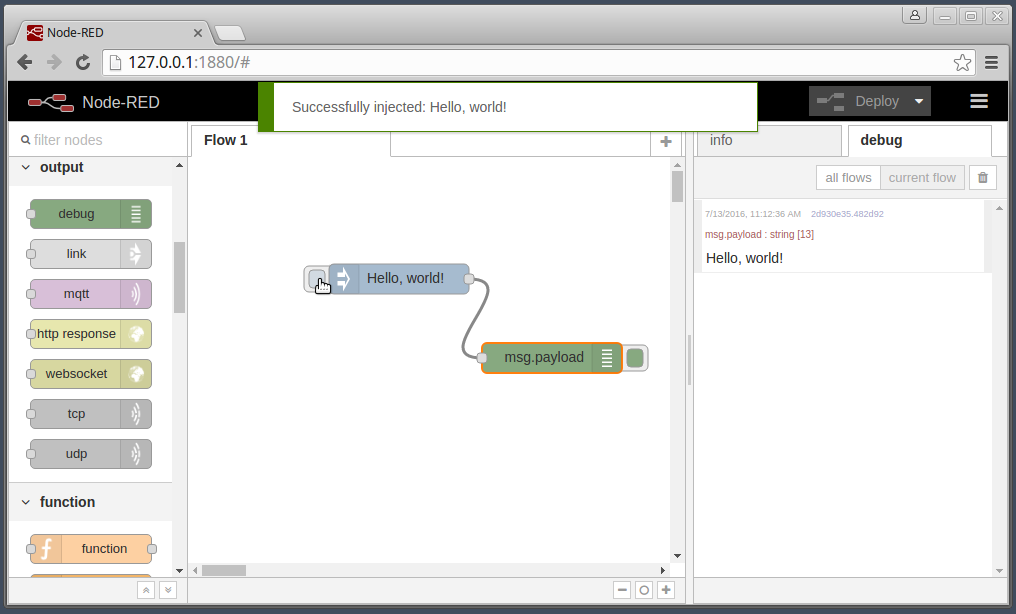
- Click the Debug tab in the right-hand side of the editor window.
- Click the Inject node’s button, which is the blue square coming out from the left-hand side of the Inject node. Clicking the button is what will inject a message into the flow.
- A “Hello, world!” message should appear in the debug window.
- Click the Inject node again to send another message.


沒有留言:
張貼留言