After completed above oprations, try to upload the first sketch to the NodeMCU.
Preparation
Code:
Connect your NodeMCU to the PC and put below code to your Arduino IDE .
void setup()
{
Serial.begin(115200);//Set the baudrate to 115200,same as the software settings
}
void loop()
{
Serial.println("Hello World!");//Print character string“Hello World!”on the serial
delay(5000);// Delay 5 second
}
Choose corresponding board/port for your project,upload the sketch to the board.
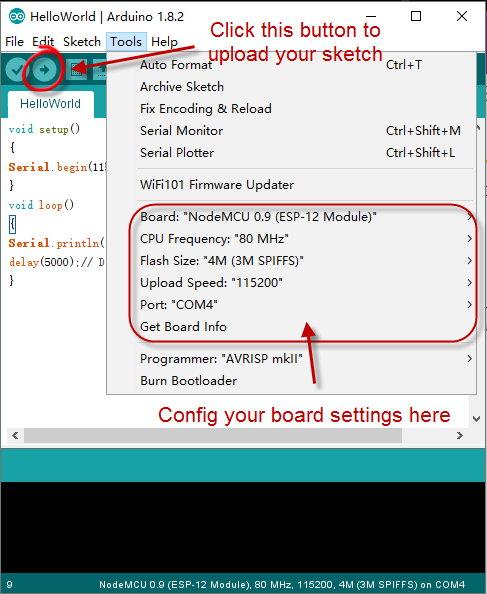
After upload down,click Serial Monitor button,you will see the running result as below:

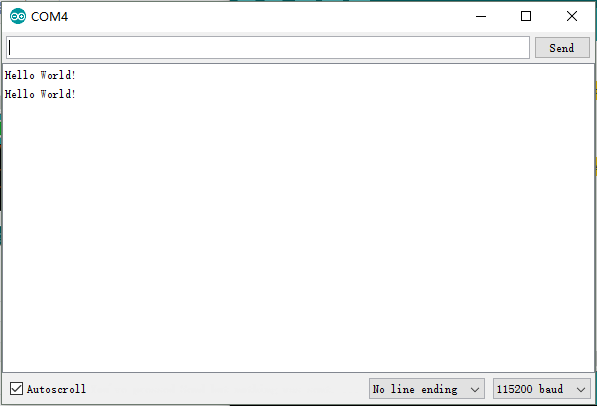
You will see the serial monitor output every 5 second.
Note: Make sure the baudrate is same as your sketch setting.
static const uint8_t D0   = 16;
static const uint8_t D1   = 5;
static const uint8_t D2   = 4;
static const uint8_t D3   = 0;
static const uint8_t D4   = 2;
static const uint8_t D5   = 14;
static const uint8_t D6   = 12;
static const uint8_t D7   = 13;
static const uint8_t D8   = 15;
static const uint8_t D9   = 3;
static const uint8_t D10  = 1;


沒有留言:
張貼留言